Showing posts with label Scrapbooking. Show all posts

Thursday, May 29, 2014

Memorial Day Inspiration "Flying Flags" by Peggy Lee

This past Monday was our Memorial Day Holiday, our family
always celebrate with watching the Memorial Day Parade.
My hubby marches every year...
My heart is always full of joy, grace and grateful to all who are and have served.
Thank You to them all, even the ones who are left behind will they serve.
I love to take a photo of the flags flying every year!
I wanted a way to gaze upon it's beauty and be reminded everyday...so I created this 
Mixed Media Scrapbook Layout of the Flying Flags!
Love the USA!
I used drywall tape as a stencil, I laid it down and scrapped 
stucco over it, then pulled it up...it leaves great texture!!
I also used some other stencils as well.
I did some random stamping, sprayed and splattered
my favorite mists, color washes...and gesso watered down.
I found some metal letters in my stash...perfect for this layout....I am going to frame this
layout and hang it on our wall to honor my hubby and our family members who have served.
Thanks for stopping in today,
hugs
Peggy Lee


Wednesday, September 25, 2013

Featured Artist Song Li

 
My name is Song Li and I am 22 years old. My real name is Conghui Li, but because my name is awkward to pronounce, I go by Song Li. I am from China but live in the U.S now. I became a huge craft enthusiast about one and half years ago. You would not believe how I got introduced to crafting. One day my boyfriend wanted to show me the crafty side of this country and took me to Michaels. He told me there are many people doing scrapbooking and it has become a real big thing. Then he walked me to the scrapbooking aisles and showed me all the beautiful papers and embellishments. I bought something because I thought they look good. After I got home and started using what I bought. What I know next is I couldn't quit crafting ever since…
 
I have not been very active before I graduated from college since I really didn't have the time. After I graduated in May this year, I immediately dived into this loving and fun crafting community. In my search for different Facebook crafting groups, I discovered Artsy Addicts. I have to say people in this group are talented! 
 
Recently, I started to post my projects in different Facebook groups and on Youtube. I realized how loving and supporting everyone is. I am so thankful for all the supports and encouragements I got from everyone. It keeps me crafting.
 
            My crafting style is very mixed media. I constantly play with different colors, textures, and techniques. Sometimes I go out of my comfort zone and do something really different as well. I do everything like scrapbooking, altered crafts, art journal, etc. Crafting is my passion and addiction. I just hope I don't need to go to a crafting rehab one day.
 
            I want to share with you the most recent layout I made. This layout is made using scraps from my stash and tons of colors. Hope you enjoy it. 


Thanks,
Song Li


Friday, September 6, 2013

Digital Lesson 5 - Mix & Match to create Hybrid Layouts

As I continue my digital series, I wanted to share with you how traditional scrapbooking supplies and digital files can compliment each other to create gorgeous layouts.  My niece Emily is the subject of today's project.   I created a hybrid layout using Marion's new Printed Paper Collection Nirvana - hitting retail stores in just a few weeks, and her digital line Scarlet

Most companies now offer digital products that compliment their printed pieces. If you stick with the same artist or brand, you will find that different collections compliment each other.

I've been creating lots of products over at the Design Team blog for the past few months with the Nirvana line, and scraps are starting to pile up.  So last weekend, I made this beautiful tag using Tim Holtz' large tag as my base. By itself - the tag is just gorgeous!  But notice that Notecard dead center looks a little empty? Well....

Tag created by Tonya A. Gibbs  from scraps of the Nirvana Line by Marion Smith Designs.  #marionsmithdesigns #nirvana #tag #papercraft #scrapbook #psychomoms #TonyaGibbs

It was designed to be an embellishment on a layout.  A place to house all of my "layers" as well as my Journaling.

Hybrid Layout created by Tonya A. Gibbs  from scraps of the Nirvana Line by Marion Smith Designs and the Digital line #Scarlet by #marionsmithdesigns #nirvana #tag #art #papercraft #scrapbook #TonyaGibbs #Psychomoms

Here was my problem.  I love the Nirvana line and it would have been awesome to use for the layout too, but I had a limited supply.   Since I only had protypes of the Nirvana line, I reached into my "digi" stash designed by Marion Smith and found that her digital line Scarlet was the perfect marriage.


Rolled Rose created by Tonya A. Gibbs using Marion Smith Designs Rolled Rose Printable. #Printable, #TonyaGibbs #Psychomoms #MarionSmithDesigns #hybrid #digital #papercraft


I also decided to use Marion's Rolled Roses. Again these roses have designs that are neutral and nicely compliment both lines.
 
I love that I was able to use my scraps to create the tag. Even better that the tag adds layers of goodness, journaling and titles to my sweet Emily Layout.

How do you use your digi/printables to compliment your paper craft projects?  I would love to see some of your designs, please share them with me in the Artsy Addicts Facebook group - make sure you tag me.

Thanks for stopping in today,

Tonya Gibbs
http://www.psychomomscrapbooks.blogspot.com


Friday, August 30, 2013

Digital Printing - Lesson 4 Phone Photos

One of the most common tools for taking photos these days is the "smart phone".  Phone manufacturers have started placing the camera feature as one of the highest selling features.  There is one on the market now that has a 41 megapixel capture. OH MY! Translation - that is better than most cameras on the market today!

So how does this make your scrapbooking digital?  Well, with the introduction of the smart phone, came apps.  I know I spend a lot of time in apps like Instagram, Pixlr, PicsArt, PSTouch, and now for the iPhone users you have Rhonna Farrer's new photo editing app.  All of these apps give you the ability to add cool filters like lighting effects, boken lights, sun rays, text, and frames right to the photo. I spend hours sometimes playing with those filters. It's like video games for adults!  Well, before the phone apps were popular we used to do those same things in photo editors and call the photos "hybrid".  These things make your photos more interesting, or at least help cover up really bad photos!

Today,  I want to share a layout that uses some of these photos, right from my Instagram account.


This layout is dedicated to the awesome friends I've made through YouTube and Facebook.  These women have really captured my heart over the past few years, and it felt so awesome to meet them face to face.

Layout created by Tonya A. Gibbs at Psychomomscrapbooks.blogspot.com using #Instagram photos  #layout, #12x12, #Silhouette, #scrapbooking, #watercolor
 
My photos are printed 2 inches by 2 inches, and when I cropped them, I made them look like little Polaroid shots.  They are ADORABLE.  Each photo is sporting a different photo effect  courtesy of the above mentioned apps.  Oh best part - you don't have to be a professional photographer for swanky photos anymore - the apps do it for you!


In the past year, I've found that my phone really captures my day to day activities more than my camera. Why? Probably because it is always in my hand, and the ability to share is easier.
Printing my Instagrams for my scrapbooking projects is easy. My printer has a wireless feature, and I think there is an app for that too! A lot of online photo processing places now have apps for loading your instagrams and printing them as well. Project life and 365 Photo projects are common ways these have found their way into the paper crafting world. I'm not only taking more photos, but I'm sharing way more photos than I did two years ago thanks to Instagram, Facebook, Twitter, Vine, Path, and Pinterest.

How are you using your phone in your scrapbooking work flow?  I would love to hear about it, please share a project with me in the Artsy Addicts group on Facebook. Make sure you Tag me in the photo!

Thanks,
Tonya Gibbs
http://www.psychomomscrapbooks.blogspot.com

Resources:

  • Recollections - Decorative Tape - Yellow flowers, Blue Flowers
  • Bella Blvd - Decorative Tape - Cotton Candy Chevron
  • Canvas Corp - Pink and Ivory Collection - 12 x 12 Paper - Ribbon Stripe
  • Canvas Corp - White & Kraft Collection - 12 x 12 Paper - Chevron
  • Canvas Corp - Black & Kraft Collection    12 x 12 Paper - Stamped Alpha
  • Canvas Corp - Green and Ivory Collection - 12 x 12 Paper - Dot Reverse
  • Canvas Corp - Brights Collection - 12 x 12 Paper - Yellow and White Big Stripe
  • Canvas Corp - Mini Clothespins - Raspberry
  • Copic - Sketch Marker - B00
  • Staedtler - 102 Stencil
  • Prima  - Chalk - Old Rose
  • Advantus - Tim Holtz - Idea-ology - Tiny Attacher with 100 Tiny Staples
  • EK Success  - Border Punch - Notebook
  • FabScraps - Pearls - Bling - White
  • My Mind's Eye - Sky's the Limit Collection - Decorative Tape
  • Faber-Castell - Mix and Match Collection - Color Gelatos - Yellow, Blue, Pink
  • Silhouette Cameo - Electronic Cutting System
  • American Crafts - Studio Calico - Wood Veneer Pieces - Speech Bubbles
  • American Crafts - Studio Calico -  Wood Veneer Pieces - Cameras
  • Sizzix - Tim Holtz - Alterations Collection - Bigz Die - Die Cutting Template - Picture Wheel
  • Tattered Angels - Glimmer Mist Spray - Maya Blue
  • Tattered Angels - Glimmer Mist Spray - Cherub Pink

Monday, May 20, 2013

Tips with Glimmer Mist


"Sisters Layout"
I wanted to share with you all a layout I created awhile back for challenge you can see more about this here on my blog.
Today I wanted to focus on background texture I created using Tattered Angels glimmer mist, everyone needs some glimmer mist products they make your projects pop and come alive.
After I created the stucco and mask with a little stamping then came the coloring with glimmer mist!!
Tip #1
"Drippage"
 Spray your glimmer mist close to your project and lift up your project to allow the glimmer is run in different direction heat set to keep the drips where you want them to flow.
Tip #2
"Splats"
Taking your glimmer mist and unscrewing the nozzle and splatting the nozzle over your project creates great little splats of color.
Here are my two beautiful daughters "sisters" to heart, it's been a bittersweet year for them, since my oldest daughter on the left has gone to college leaving her sister, friend and home. It's been hard for her sister on the right, always having her sis at home to chat with, fight with, sing with has been heartache without her sis around, but  they were united this weekend has college year came to a close.
Tip #3
Texture chipboard
Die cut image with chipboard, add your favorite medium (I used VersaMark and Utee to create the tarnish look-roughed it up by using sandpaper to scrap some groves into the chipboard).
Spraying alot of glimmer mist over the chipboard pieces let it set up for a bit, heat set which creates a great worn look.
Love the way the mist create such different texture depending on what they are sprayed on..like the chipboard gears vs. paper...awesome!!
I encourage you to dig out your glimmer mist and play!
Thanks, Peggy Lee

supplies:
Tattered Angels: glimmer mist-riptide, graphite, and sunflower
other supplies list you can see here.

Friday, April 26, 2013

Tarnished Silver - Tattered Angels


This week has been so fun, I've been trying out some new products and getting my fingers stained with inks.  Today I wanted to share with you one of the cards that I made using the Tattered Angels' Naturally Aged Paint System Bare Metal Tarnished Silver.   This paint system adds so much texture and shine to your dull card stock, that you have to touch it to see if it is metal.


Canvas Corp Mini Red Clothes Pins, 7 Gypsies Washi Tapes, Tattered Angels Naturally Aged Paint System Bare Metal Tarnished Silver. Other: Nesting Labels Punches EK Success and Stamping Up, Studio G Make A Wish Stamp, Ranger:
Archival Ink Jet Black, Tim Holtz Sizzix Alterations Texture Fade Patchwork, Distress Ink Pumice Stone.


For my card base I used a Tim Holtz Alterations Texture Fade Patchwork on the bare card stock, then added my paint mediums.   I love how the paints bring out the texture from the embossing and make this look like embossed metal. 


I have a few videos demonstrating how this card was made. 

The first is a step by step for the paint system


This video shows how I made the card


Thanks for stopping in today, I hope you have a great weekend.  If you are using these paint systems, I would love to see your creations, please share them with me on Facebook. 
 
 
Tonya Gibbs


Friday, April 19, 2013

Butterfly Tag


Pink Paislee's new Hope Chest collection has inspired today's post.  I'm working on a  project with the papers for my next Ustream, May 6 at 8:30 p.m. EST, and wanted to try some techniques out on a tag before the class. Today, I would like to share with you the techniques used to create the background and blue flowers.


Here is a glimpse at the products that I used  when making the tag. 


Ranger: Archival Ink in Black & Vermillion, Distress ink Evergreen Bough, Rusty Hinge, Glue & Seal, Tag;  Prima: Distress Tool; Hampton Arts: Remember This Background stamp, Tattered Angels: Wheatfields Glimmer Mist, True Turquoise (optional substitute more blue than green), Island Spring Glimmer Glam, Vintage Pattern Paper, Paint Brush.


Cover the tag with Glue & Seal or Matt Medium, then cut interesting pattern strips from the pattern paper, and use the glue and seal over the top to adhere it to the tag's service.  Let the tag dry completely then trim the extra paper from the edges. 


Shake up the bottle of Island Spring Glimmer Glam really well, then splatter it around the tag.   Let it dry completely before going to the next step. The Glam is like a glaze and will leave glossy splatters.   You can use a heat tool to speed up this process.  Using a heat gun will also cause the glam to bubble offering a different texture.

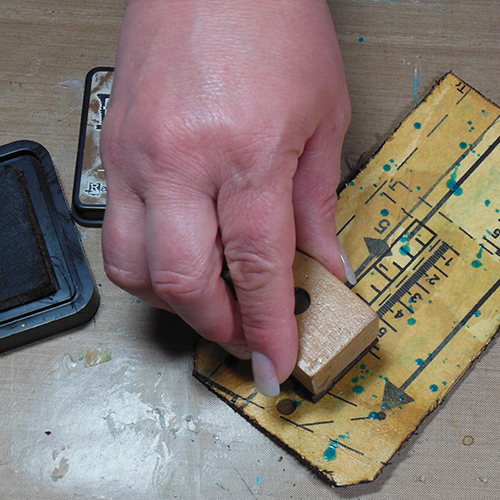
 Make sure the tag is completely dry.  Then use the Prima distress tool to distress the edges.  If you do not have this tool, use scissors to scrape down the sides.


Use the Gathered Twigs Distress Ink to darken the edges and the creases on the top of the tag.  Really work the distress ink into the tag.  Use your heat tool to set the distress ink into the tag, as it will take longer to dry on its own due to the glue & seal. 


Completely saturate the top of the tag with the Rusty Hinge Distress ink, then use a baby wipe or paper towel to gently wipe down the surface.  The Rusty Hinge will give the tag an aged color. Again, use your heat tool to set the distress ink.


Use a butterfly stamp with Jet Black Archival Ink to stamp the images around the tag. be sure to rotate your stamp so that your butterflies are coming from different directions.  Leaving some white space is important - Don't over do it.


Use a text based stamp like this one from Hampton Arts with some Vermillion Archival Ink. Again be sure to rotate your stamp to add interest.  I love how this stamp says "LOVE TODAY!"  So I wanted to make sure it was stamped in the upper right hand corner so that I didn't cover those words up.


For the flower, I used a white Prima Flower that had pointed leaves to mimic the flower found in the paper collection.  Since the flowers in the paper collection were also a teal color, I decided to cover them with Evergreen Bouge Distress Ink.   dont' worry if white areas are exposed, you will fix those with the next step.

Since distress is reactive with water, and Glimmer Mist is water based, I used the Wheatfields Glimmer Mist to fill in the white spaces tone down the brightness of the blue/green. Dry the flower with a heat gun until it is completely dry.  Using your heat gun, will also singe the edges making them appear more natural.


Fold the flower in half and apply hot glue to the inside to hold it in place as demonstrated above.

Now, fold the from left to right in half again, adding glue between these two layers.


Fold in half from left to right one more time, applying glue to the inside of this fold and pinch together at the bottom.  These flowers will be tucked into the floral spray on the right of the tag.


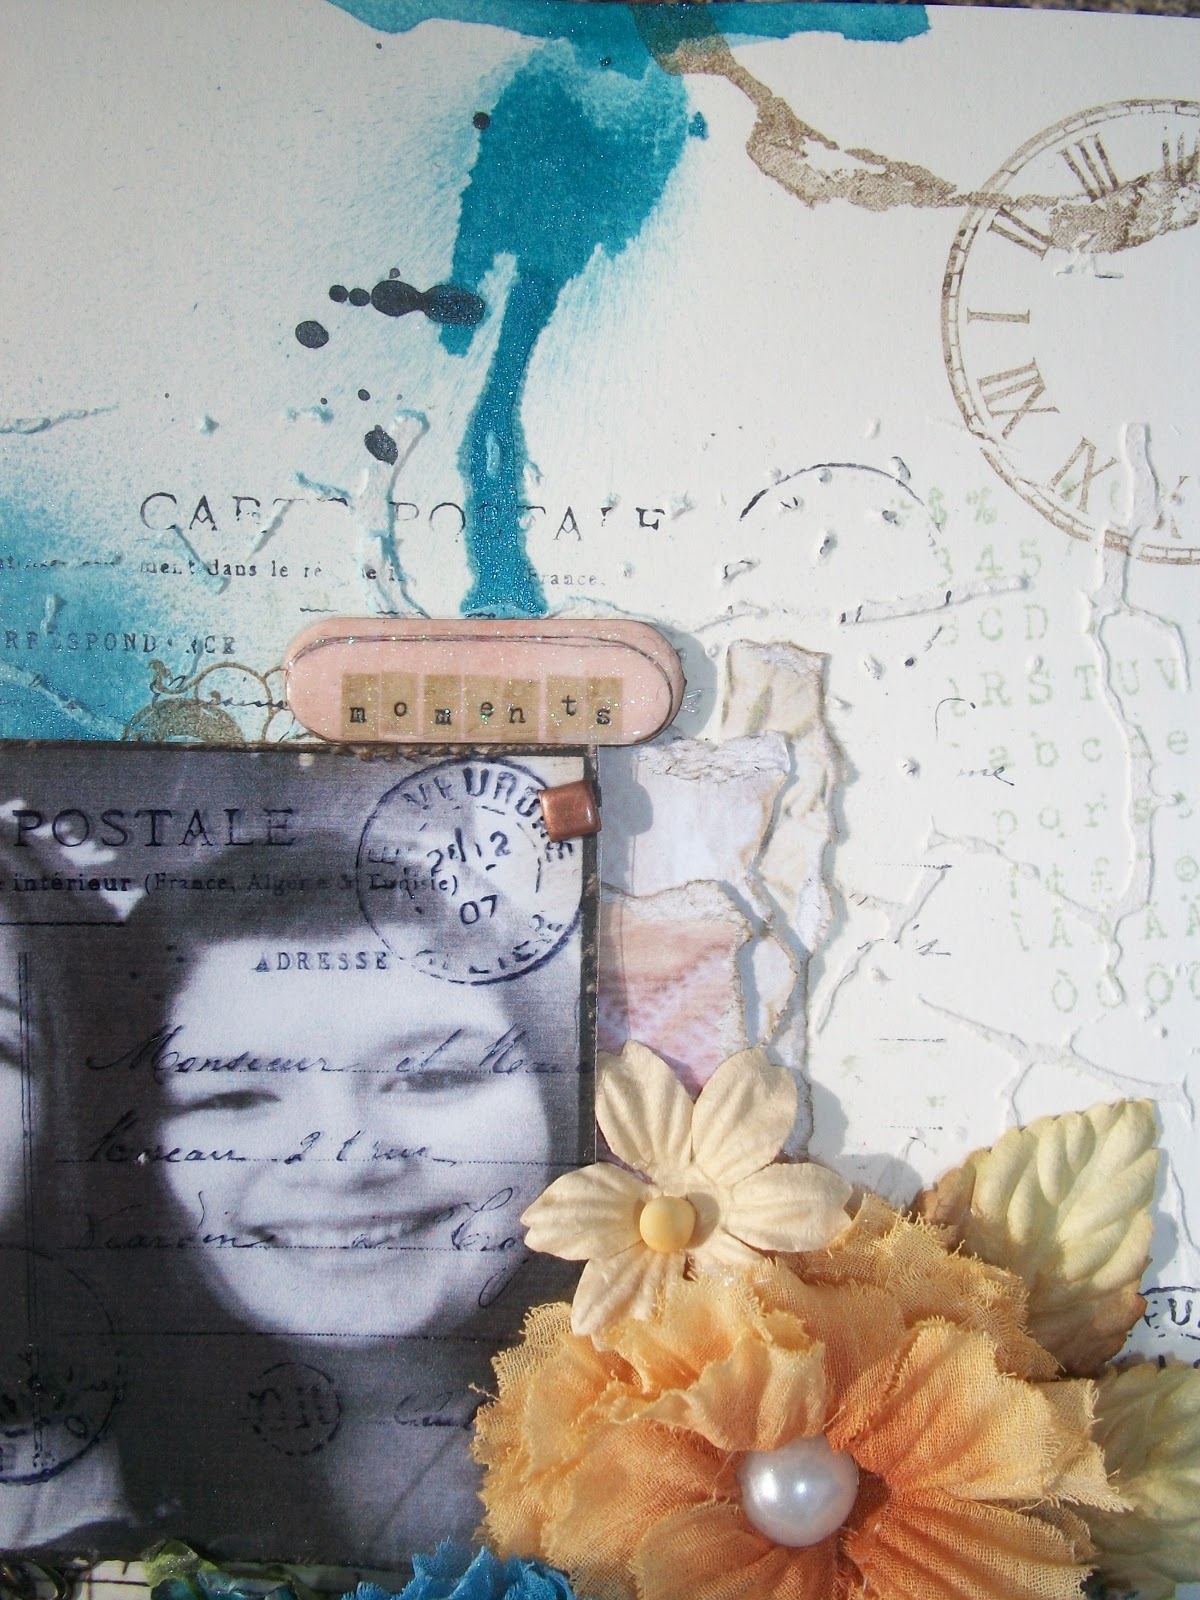
To finish the tag off, I used scrap parts from a Prima Valentine Spray, Metal Trinkets, and a clock from Prima.  The floral spray was white so I used the Wheatfield Glimmer Mist to color the heart and flowers.   The charm quote at the top is from the Girl's Paperie.  The butterfly I showed you guys how to make a few weeks ago in a previous post.

Thanks for stopping in today,

Tonya Gibbs
http://www.psychomomscrapbooks.blogspot.com


Wednesday, November 21, 2012

Happy Thanksgiving

Today the United States celebrates Thanksgiving.  This is a time for us to reflect on the blessings in our lives, and a time for us to give thanks.  I for one am thankful and blessed for so many reasons personal, professional, and in my hobby.  As you move about your day today I hope you stop to think about the little things as well as the big. 
 
One of my biggest blessings is the friendships I have made in the crafty community. I have been a follower of Marion since before Brooke was born. I had the chance to take one of her classes a few years ago, and since then our relationship has blossomed. It is awesome to now call a mentor friend.  I recently had the opportunity to meet with Marion and her family at the Arsty Escape. I wanted to create a layout of the two of us together. 


A few days ago Marion announced her latest printable the Grand Mini Album collection. I fell in love the second it was downloaded.  The patterns are in rich turquoises, teals, tans, yellows, greens and blacks with chevrons, news ads, damasks, and her signature distressed vintage style. 
 
I couldn't wait to make something with it.  This layout uses 2 sheets of the patterned paper, the note cards, and an envelope.  I used my punches, dies, and Spellbinders to give the individual pages interesting edges.  In the background I distressed the card stock and added some paint to match the colors in the mini. Then drew a grid on the paper leaving some of the grid unfinished for interest.  The scraps were punched with label punches and butterflies.  I collaged the pieces and made this 12x12 layout from mostly 5x7 designs.  To draw you eye to the center. I cut the Chevron strips and made the flags/arrows pointing to the photo.  The photo was an Instagram photo that I cropped to look like an old Polaroid.  I then painted some Prima Pillar White flowers to match the flowers in Marion's designs. 
 
I love the look of this layout, it was so fun playing with these patterns. I'm in the process of making a mini album now, that I can't wait to share with you. 

I hope you guys have a fantastic day with family today, and take sometime for yourself.
 
Thanks for stopping in today,
 
Tonya Gibbs
 
Resources:
Marion Smith Designs: Grand Mini Album Printable
Prima: Flowers, and Leaves, Distress Tool, and Song Bird Ticket stamp, Romance Novel Washi Tape
Hampton Arts: Remember This Background stamp 
Spellbinders: Large Square Nestabilities, Grand Nestabilities Labels 4 Die
Sizzix: Tim Holtz dies: Butterflies, On the Edge File Tabs,  Type Set Alpha die.
EK Success: Label Punch, corner rounder
We Are Memory Keepers: Curly Bracket Tab punch
Golden Gesso
Liquitex Gold Ink
Martha Stewart Paint: Pool, Butterfly Punch
Ranger/Tim Holtz: Archival Ink Sepia, Distress Ink Gathered Twigs, Tiny Attacher, Tissue Tape - Definitions


Monday, November 19, 2012

"A Perfect Day" Layout with Romance Novel Papers

I couldn't wait to play with Marion Smith's new Romance Novel paper line collection from Prima, which is to die for...so beautiful!!! Love the title of this layout "A Perfect Day" cause that is actually what kind of day it was for these girls, best friends enjoying their last day together before they all set out to explore the world. My daughter far right is attending college in NH about three hours away, which we are driving to pick her up in the morning for Thanksgiving break. Paige in the middle is at college in Vermont she is dearly missed by her family and us, and then far left is Mikaela who is in Costa Rica for college that girl loves to travel the world. We miss them all so much!
The Romance Novel paper line is so perfect for my girls they all love pinks, splash of black and bling for everything. Marion's line is every women's hearts desire to dream, explore and embrace the inner girl with such beauty in expressing your passion of life.

And who doesn't love Prima flowers and bling!!!
Marion's eye for details in the little things are perfect for tucking in little notes with journal spots, pockets just like this pocket that I glued the flap down and cut open the top to slide in a little note tag. (great for hiding little private message that you don't want everyone to read as they gaze upon the layout).
We would love to see your creations, post them to the Artsy Addicts Face book page.

Happy Thanksgiving everyone, hugs Peggy Lee

(I am thankful, that I can create with Marion's designs and thankful to be apart of this amazing team.)
 Thank you  for all you do-Marion, Garett, Tonya and Angie!

Supplies:
Swirlydoos kit-showcasing Prima Romance Novel

Monday, September 17, 2012

Two of a Kind / Garment District Layout

Besties-two of a kind girlfriends since second grade my daughter Olivia and her best friend Mikaela. Who both are now miles apart in colleges but are so close in heart. I knew when I saw this picture that I had to use the new Garment District Printables by Marion Smith.
The printables are 8.5 x 11 (with a 1/4 boarder making them slightly smaller) perfect for creating a 12x12 layout with layering. To save on the paper I stacked three of my fav's on top of each other marked where to trim out (cut a good size square of paper out of the middle-to save for another project) scraps work great for cards or tags.
12 x12 card stock base I used a script stamp, inked edges and brushed on white paint randomly to help fill in the edges.
I used the Tim Holtz Alterations Distressed Doily die to make a frame around the photo. What girl doesn't want a shabby chic dress form to dress up the layout!
Then I fussy cut out the roses from another sheet to help bring out the roses on the base paper. Added some Prima flowers and embellishments with tulle and peals.
Loved the two ladies that comes in the Add-ons a journal spot just fussy cut them out and tucked them in around the photo.
little tip-see the ruler under the dress form (that is from one of the pages I cut a strip off, snipped it to desired length inked the edges and popped up to give depth. so cute...

Tip of the day-don't let the size of the printable discourage you for doing 12 x 12 layouts or anything you desire to create-look at it, rethink it, arrange it before you glue down. You will create your very own master piece!!

Happy Scrappin-Peggy Lee


Supplies:
Garment District Printables
Bazill card stock
Tim Holtz Alterations Distressed Doily Die, Dress form Die, Distress Inks ( pumice stone, brushed corduroy and walnut stain) and Adirondack Acrylic Paint (snow-cap)
Prima flowers (star spray-cut apart, Innoscence collection)
CTMH stamp (script background)
Ranger Archival Ink (black)
olde book text paper
trims, lace, tulle, pearls and gems
Adhesive-Helmar 450, 3D dots
   

Friday, August 10, 2012

Stashed Treasures

I was involved in a conversation the other day in a group about buying supplies that are "MUST HAVES" that never get used.  Guilty as charged - I buy and I hoard.  But in the past few years I have issued myself a challenge to "USE" what I have and for every new item I must use something old -  either scraps or products in my stash doesn't matter - but something old for everything new.

So, after the conversation with the friend,  I decided to use what I had in my stash to create this 8x8 layout.  But I wanted to take it one step further and use a tool or stamp that I've never used that has been in my possession for at least a year or more.

NOTE: Part of my journaling is missing from the layout, because I'm mailing it to someone to add to a book, and I would like that to stay private.


So the Telephone is the thing I've had for years and never used it was a Sizzix Original Die that I bought on clearance for $2.00.  Had to HAVE IT - You hear me?   And have never ever used it.  I love how it looks with the Almanac paper from Prima. JUST Gorgeous.  I cut it from black chipboard then used UTEE to make it shiny.

Take a closer look at the handle to the phone  I fussy cute that element from the paper then fused it to the die cut with UTEE.  Love how it looks engraved.


You can really see all the layers in the close ups   I used papers from scraps, and papers from 6x6 pads that I've been hoarding.


My photo and journaling is hidden behind the telephone.  The phone is held closed with a magnet.


Do you have things in your stash that you "had to have" but have never used?   I challenge you to take those items out and use them on a project.  Share with me the project that you created on the Artsy Addicts blog.  I would love to see them. 

Thanks for stopping in today,

Tonya Gibbs

Resources: 
  • Prima: Almanac Paper 6x6, Reflections Paper: Shalimar, Fairy Belle Paper, Almanac - die cuts, Flowers, Distress Tool.
  • My Favorite Things:  Bracket Tab die
  • Tim Holtz: Ideaology - Number Plaques
  • Sizzix: Telephone #2 Original Die
  • Ranger: UTEE
  • Martha Stewart Leaf Punch
  • Twine, Rhinestones
  • Bazzil Black Card stock
  • Sewing Machine
  • Doilies
  • Recollections Washi Tape Silhouette Lady


Related Posts Plugin for WordPress, Blogger...
 
Pin It button on image hover