Friday, May 30, 2014

Tips for Masculine Layouts by Tonya Gibbs


Well this is my last post of the month, and I issued everyone a challenge to create masculine  projects. The scrapbooking industry is full of products for feminine designs and it is sometimes a challenge to create for the men in your life. All month Peggy and I have been sharing some great projects, that I hope have inspired you. Today I thought I would recap some tips on how I set out to create Masculine layouts.


1)  Dig around in your stash for items that have a neutral theme and color.   I like to select colors that are blue, red, neutrals (grey, tan, brown, black, white) and green.  Not that there is any kind of rule to sticking to a color, I just find that these colors help my focus stay masculine.
 
2)  Look for embellishments in your stash that are not gender specific, like the Dictionary Tissue Tape from Tim Holtz, Star Sequins, and chevron designs, notebook paper, cameras, arrows, tickets, labels, wood veneers and tags. Metal accents are awesome for Masculine projects.
 
 
3) Select papers that lean more on the masculine side.  Like the Heidi Swapp No Limits papers - which were actually travel papers, but you can't tell after it was used and the Echo Park Note to Self (which has a lot of things you can fussy cut to add interest to your layout).


 Here is a process video of me making the layout!
 
 
Here is the finished layout. 


My son's girlfriend said to me yesterday "I like that this layout is very masculine, but still has a lot of sparkle!"   Don't be afraid to use sparkle elements or even flowers on a masculine layout - just don't over do it!  
 
 
I hope this post has helped you with ideas on creating masculine projects.
 
Thanks for stopping in today,
 
Tonya Gibbs


Resources: 

Heidi Swapp  - No Limits Paper collection
Heidi Swapp - Confetti Stencil 6x6
7 Gypsies Paddington clear stamp
7 Gypsies - Postale Index Cards7 Gypsies - Naked Index Cards
7 Gypsies - Library Drawer - Tabbed Dividers - Naked Tabs
My Mind's Eye - Everyday Funday kraft - Everyday Fun stamps
My Mind's Eye - Find Your Wings & Fly - Stamps
Tim Holtz - Idea-ology - dictionary tissue tape
Tim Holtz - Idea-ology - Tiny Attacher
Sizzix - Tim Holtz - Alterations Frameworks Border Die Chevron
Studio Calico - Wood Veneer Hearts & Arrows
Studio Calico - Wood Veneer School Days Speech Bubbles
Ranger Ink - Archival Ink Vermillion
Cosmo Cricket - Glitter Adhesive Sheets  Red, Blue, Silver
Fiskars Circle Punch - 1.75 Inches
Marvy Circle Punch - 2 Inches
Washi - Red Chevron
Prima Wood Veneer Camera
Black Sharpie
EK-Success-Notebook-Border-Punch
EK Success Zig Writer
Clear Glitter Nail Polish
Star Sequins
Grid Line Index Cards
Labels
Color Box Pigment Stamp Ink Silver
Color Smart Pigment Stamp Ink White
Hampton Art - 7 Gypsies - Clear Acrylic Stamps - Varsity
Hampton Art Rubber Stamp A Day To Remember Numbers
Echo Park  Note to Self


Thursday, May 29, 2014

Memorial Day Inspiration "Flying Flags" by Peggy Lee

This past Monday was our Memorial Day Holiday, our family
always celebrate with watching the Memorial Day Parade.
My hubby marches every year...
My heart is always full of joy, grace and grateful to all who are and have served.
Thank You to them all, even the ones who are left behind will they serve.
I love to take a photo of the flags flying every year!
I wanted a way to gaze upon it's beauty and be reminded everyday...so I created this 
Mixed Media Scrapbook Layout of the Flying Flags!
Love the USA!
I used drywall tape as a stencil, I laid it down and scrapped 
stucco over it, then pulled it up...it leaves great texture!!
I also used some other stencils as well.
I did some random stamping, sprayed and splattered
my favorite mists, color washes...and gesso watered down.
I found some metal letters in my stash...perfect for this layout....I am going to frame this
layout and hang it on our wall to honor my hubby and our family members who have served.
Thanks for stopping in today,
hugs
Peggy Lee


Friday, May 23, 2014

Baby Shower Card by Tonya Gibbs


Hi everyone, I have a simple little card to share with you today.  Our theme this month is masculine. So I thought I would share a simple little baby shower card that I created using the scraps from the "Spread Your Wings and Fly" kit to create a card.

 
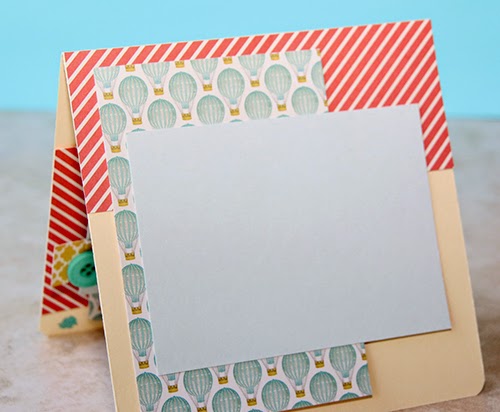
This is the outside of the card.  I only used scraps from the paper collection. Small pieces of scraps when torn on the edge, create a nice washi tape look.  


I decided to decorate the inside of the card with the remaining scraps.  This card and design could easily be used for several occasions by simply modifying the greeting.  Don't forget to post your masculine projects in the Artsy Addicts Facebook page.  I can't wait to see what you create!
 
Thanks for stopping in today. 
 
Tonya Gibbs.

Monday, May 19, 2014

My Hero "Father's Day Card" by Peggy Lee

Good morning everyone, with Father's Day upon us soon in just a few
short weeks...I wanted to share with you all one of my cards.
I used a stamp set called "My Hero"!
Started with a white card base.
Stamped the airplane in chocolate ink (second generations stamping).
I also fussy cut out the images from the Skylark paper packet...
Inked all the edges with chocolate ink.
I popped up the images with tucking the banners to give
depth to the card...like the banners are flying.
As I type this blog post I remember my father who has been gone 
for  many years...I so miss him, love him more deeply!!
I try to share memories of him with my daughters, telling them stories
that he would share, songs he would sing....
I believe even though he is not with us, He Is!
Thanks for stopping in today,
hugs
Peggy Lee


Supplies:
Close To My Heart
Stamps, paper, embellishments


Friday, May 16, 2014

Masculine Cards with Tonya Gibbs

Father's Day will be here before you know it!   I know everyone struggles with masculine cards, so today I'm going to show you two versions of card from one sketch.  


I found this sketch on Pinterest from PageMaps.com  it seemed so simple, and I thought it would make a nice "any" occasion simple flat card that could be mailed to anyone.  Change up the colors to feminine and it would be a great design for a woman as well.   I really love simple versatile sketches. 


So I thought I would make two of these cards. The first is with some scraps left over from a DCWV Tattered Time paper stack.  The gears are super masculine, and if you didn't want to leave the card flat, you could add a few metal gears in a cluster above the sentiment.
 
 
On this version I used only Washi Tape, kept the tapes black and white, then stamped the sentiment  in red so it would pop. 


I hope this inspires you to create a masculine card.  If so, please share your card designs with us on the Artsy Addicts Facebook page.
 
 
Thanks for stopping in today,
Tonya Gibbs


Monday, May 12, 2014

Garden Rose Card by Peggy Lee "Tutorial"

Happy Monday Morning to you all, it's Peggy Lee here
sharing with you all my mixed media card "Garden Rose" Card!
Garden Rose Stamp and Textured Edges Stamp.
Tutorial
I started with watercolor paper.
Using Archival Ink in black stamped the Garden Rose image
several times.
Card Base 4 1/4 x 6 size
Did more stamping on the card base for background texture.
After I stamped the images...I grabbed a few Tattered Angels
Glimmer Mist colors...started water coloring painting..using a small brush.
I painted several parts of the other stamped images..to but cut apart.
To add to the center of rose to give depth.
See the depth of adding layers to your stamped images.
Also added some more texture with gesso and stencils.
LOVE THIS TEXTURE

There you have it a simple mixed media card...just using stamps, ink,
glimmer mist and gesso!!
Give it a try, I know you will love it!!!

Thanks for stopping in,
hugs
Peggy Lee

Supplies:
Marion Smith Designs-Garden Rose & Textured Edges Stamps
Tattered Angels-glimmer mist in Cranberry Zing, Olive Vine & English Ivy
Ranger-Archival ink and liquid pearls in bisque
Stampers Anonymous- Tim Holtz Dot Fade Stencil
water color paper
gesso

Friday, May 9, 2014

Varsity Layout by Tonya Gibbs - May Challenge


Hi everyone, wow can you believe that school is almost out?  Where did the time go? Seriously It was just fall in my mind.   My son, Brighton, is a Jr. this year and I'm going to spend some time in the next year crying - no seriously - documenting his high school story!   I know it is hard to sometimes create Masculine Layouts so I have a few tips to kick start your creative process.

 
First of all GRUNGE makes masculine layouts come together so easily.  And what better way to get grunge then Mixed Media.  Just like little boys - the messier the better! Texture is my next hint!  I think you can't have too much texture on a boy layout!  


Second - stick to masculine colors.  Like Blues, Greens, black, browns.  Since my son's high school colors are Blue, White & Red, I decided to use them for my focal color pallet.


I typically avoid flower clusters and stick to masculine paper elements.  7Gypsies Vintage Varsity line was perfect for this layout - since it offered so many 'sports' themed elements that could be fussy cut and used for layers. 
 
Here is a process video of me making this layout.


I challenge you to post some masculine projects this month in the AA Facebook page.  From little boys, to grown me, it is a challenge sometimes to work with their photos, but they deserve to be documented too!    With Father's Day in a few short weeks, this will kick start your brain into thinking masculine!  
 
 
Thanks for stopping in today,
 
Tonya Gibbs
 
 
Layout Supplies:  
  • Canvas Corp - White smooth Cardstock
  • 7Gypsies - Vintage Varsity 8x8 pad
  • Stamper's Anonymous & Tim Holtz - The Ultimate Grunge
  • Tattered Angels - Silver Glimmer Mist
  • Faber Castell - Design Memory Craft   PITT Big Brush Artist Pens in the following Colors:
    • Black,
    • White,
    • Cold Grey I 230,
    • Cold Grey IV 233,
    • Phthalo Blue 110,
    • Dark Sepia 175,
    • Deep Scarlet Red 219
  • Faber - Castell Design Memory Craft Gelatos in the following colors:
    • Dark Blue
    • Silver
  • Faber-Castell Design Memory Craft Glaze
  • The Crafter's Workshop 6x6 stencils in the following Patterns:
    • Mini Numbers
    • Mini Well Rounded (this is the grunge stencil)
    • Mini Wonky Circles
  • Liquitex - Full Body Gesso
  • Prima - Distress Tool
  • Pearl Ex -  Interference Red
  • Score Tape
  • Scotch - ATG
  • Scotch - Mounting Foam
  • Idea-ology - Tim Holtz - Grunge Board Numbers
  • Idea-ology - Tim Holtz - Sanding Block
  • Cosmo Cricket  - Silver Glitter Adhesive Sheets
  • Studio Calico - Wood Veneer Speech Bubbles
  • Studio Calico - Wood Veneer Abroad Cameras
  • Clear Glitter Nail Polish
  • EK Success - Square Binding Edge Punch
  • Stars - Rhinestone buttons
  • Index Card

Tuesday, May 6, 2014

April Artsy Addicts Challenge Recap

In April, I issued a challenge in the Artsy Addicts Facebook Group for you to use this sketch to create a project of your choice.


Don't forget to Pin it for future reference.  If you decided to follow this sketch make sure you #ArtsyAddictsAprilChallenge, then share your creation with us in the Facebook Group. 

This was the sample that went with the sketch....


We had a few people participate, and I wanted to share their projects along with the admin projects with you today.  Please stop over at their respective blogs and give them some comment love!

Devon's Divine Designs
Look at this fantastic thank you card Devon created with  papers she found in her scrap pile.  I love her soft color choices. And the feathers were a nice festive addition.


Annmarie Colbert - Annie's Stamping Corner
 has  created a festive Birthday card using Graphic 45's Bohemian Bazaar Collection. This collection was released a few seasons ago. Way to go - using that hoard vault goodness! 


Admin Peggy Lee Baker  - Creative Scraps by Peggy Lee
shares with us her creation using a nice pink and green combo with a few mixed media touches!


Admin Tonya Gibbs  - PsychoMoms
Here were my takes on the sketch.


This is a great sketch for a simple easy to create card design.  The challenge was intended to jump start your creative mindset.  Thanks to everyone who participated. Make sure you check my post on Friday for the May Challenge. 

Thanks for stopping in today, 
Tonya Gibbs 
http://www.psychomoms.com

Friday, May 2, 2014

Family Story Layout by Tonya Gibbs


Hi everyone,  Mother's Day is around the corner, and today I thought I would share a layout of my family. My kids are turning into young adults right in front of my eyes. They are both in serious relationships and I thought it would be nice to document the time we have spent with them. I love spending time with all of them. For those of you who know me personally you know that Family is everything to me.  I wanted this layout to show them all how much I love them!  It is the highlight of my day when I can see all their faces! 

My friend pinned this layout sketch from PageDrafts.com yesterday and it totally inspired me. 


I selected Teresa Collin's Family Stories collection for my layout. I loved the soft aquas pinks and Navy blues in this collection and thought it would be great with my photos.

I also used the Teresa Collins Stencil 


Tattered Angel's Bubbles Glimmer Mist and little Modeling paste added the perfect texture to my background. 


I decided to use some Cosmo Cricket Glitter paper for my flags and wanted them to match my layout colors. I grabbed my Faber-Castell Design Memory Craft PITT Artist Pens and colored over the silver glitter. I think I'm falling in love with glitter thanks to Cosmo Cricket and their shed proof sheets!  


I had a few extra Bloom Sparklers from Webster's Pages on a card. You guys know how much I love to use extra piece here and there.  I decided they were perfect for the centers of my flowers.  I also spritzed the flower clusters with the Tattered Angel's Bubbles Glimmer Mist. This is the perfect minty blue color with silver glimmer.


Die-Namites Dies Leafy Branch die was the perfect addition to finish off my cluster.  Since my family is my anchor, I decided to nestle the Anchor charm from the ephemera pack into the flower cluster. 


I used one of the note cards in the collection to die-cut butterflies using a Martha Stewart Punch, and the Tim Holtz mover's and shapers die.   My photo was matted on the Spring Doily from Die-namites to give it a nice petite scallop border  then double matted onto a pastry doily for added texture and depth.  I used lots of the snippet titles from the Teresa Collins Ephemera pack around the page as my title, and used the title area of the sketch for my journaling. 

My kids are growing so fast and I know they are going to start leaving the nest soon. I want them to spread their wings and fly, but when they do this Momma is going to probably fall apart. No matter where life takes them, or who they pick as their life partner,  I hope they always treasure family time, and remember how much they are loved! 

Thanks for stopping in today, 

Tonya Gibbs
http://www.psychomoms.com 
Related Posts Plugin for WordPress, Blogger...
 
Pin It button on image hover