Friday, February 28, 2014

March Challenge by Tonya Gibbs


Pantone has announced that its 2014 color of the year is Radiant Orchid.  Well I have to admit, purple is not usually my first choice, but I do think the color makes a powerful statement when used properly.  So I thought I would use this opportunity to challenge myself, and the other members in the Artsy Addicts Facebook group.  Let's use this color tone in March!
 
Just for a little fun - I would like to purpose a challenge for March 2014. We will feature the work of those who participate before the deadline on the We Are Artsy Addicts blog.  This is a personal challenge and not a contest, so there are no winners or prizes. 
 
Here is what you need to do....
 
**RULES**
  1. Post a photo of your project in the Artsy Addicts Facebook Group (Only 1 project per participant will be included in the blog post. However, feel free to post as many projects as you like with the challenge).
  2. Give a description to your project (this will be used as the caption for the post on the blog)
  3. Hash tag the post ‪#‎AAMarchChallenge‬ (this is so I can find them later)
  4. Deadline for posting is March 24 (you can still post after this date, but it may not be featured on this blog).
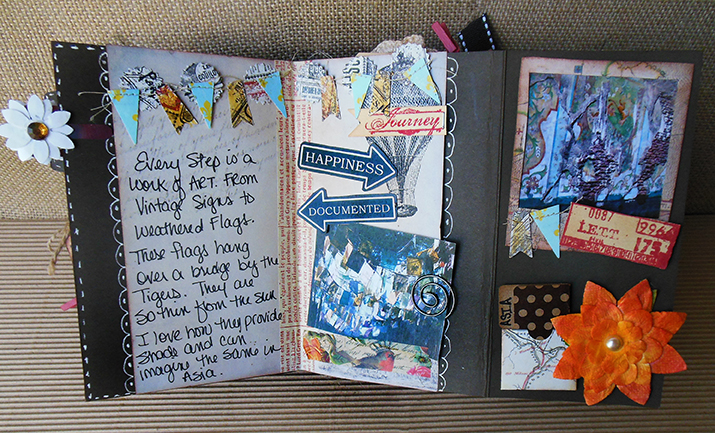
So for inspiration I have created a little card.


Can't wait to see what you guys create!

Tonya
http://www.psychomomscrapbooks.blogspot.com

Resources:

Tattered Angels - Glimmer Mist Spray - Timeless Lilac
Tattered Angels - Glimmer Mist Spray - Popsicle
Die-Namite Dies - Flowering Tree
Prima Chalk - Teal Damask
Prima Chalk - Pastel Blue
Prima Chalk - Olive Vine
Prima 6x6 paper pad - Alla Prima
Prima Flowers - Wildflowers Pillar Pack Collection
Prima 6x6 paper pad - Almanac
Fiskars Simple Stick Cling Rubber Stamp Sheet - All Year Cheer
Heidi Swapp -  Color Shine - Gold Lame
Faber-Castell Design Memory Craft Whipped Spackle
Stampers Anonymous - Tim Holtz - Cling Mounted Rubber Stamp Set - Ultimate Grunge
Ranger Ink - Tim Holtz - Distress Marker - Shaded Lilac
Ranger Ink - Tim Holtz - Distress Marker - Shabby Shutters
Ranger Ink - Utee
Black Sharpie Marker
Burlap scrap
Clear Gold Glitter Nail Polish
Martha Stewart Crafts - Crafter's Clay Collection - White Clay
Cameo Setting Frame Silicone Mold


Monday, February 24, 2014

Baby Shower Card

Good morning peeps!!
Here is a little pretty baby card....
I went to a baby shower over the weekend.
I grabbed my CTMH Babycakes paper-layered the pattern paper...
Cut the zip strips off the edge of the paper....adorable saying 
baby, baby, baby!!
Stamp the little sentiment in slate ink.
Baker's twine double bow with button!
I also love to fussy cut out images from my pattern papers.
This little guy was so adorable couldn't resist!!


Thanks for stopping in today!
hugs,
Peggy Lee

Supplies:
All Close To My Heart

Friday, February 21, 2014

7GYPSIES Travel Mini

Last year I  took a trip to Walt Disney's Epcot & Animal Kingdom in Orlando, Fl., and I wanted to create a journal style mini album that could capture not only the pictures of the "aha" inspiring landscape, but my thoughts and notes.  I wanted to make it like a travelogue that had gone along the journey with me - eclectic and worn - gypsy style.
 
7Gypsies Travel line was perfect for my base papers and a bit "non - traditional" for Disney style books. I gathered up several lines of 7Gypsies ephemera, tapes, charms, and stamps, threw in some Canvas Corp tags, recipe cards, and clothes pins. Grabbed some essential Tattered Angels Glimmer Mists and the book was born.  The finished book size is 4.5 x 6 which is great for standard sized photos.


As an added accent, I also created circle and tab tags in Photoshop to accent the folders. I love how things stick out from the margin, and entice you to turn the page. I also did a lot of hand written journaling in this book. My handwriting may not be perfect to me, but I think it really adds character to the book.
 
 
I often spell Gorgeous "Gorjuss" when I text or type it on Facebook, so I wanted my accent in the upper left to reflect the "Tonya" spelling. This adds a little bit of my character to the details. In the bottom right hand corner of the page above there is a clay piece that says "Air Mail". This was created with air dry clay and a 7Gypsies stamp! 


In the photos above and below, I used scraps from 7Gypsies papers to create interesting flags and banners. I love how these pop, and add a feminine accent to the pages.


Doodling with a white gel pen, adds a even more interest. Some of my doodles are loops and some faux stitching. Love how it helps to soften the dark background.


In this spread above - I use recycled clear plastic packaging to create a signature divider.  I used Tim Holtz's distress paint in Firebrick to create a design on the plastic.  I love how you can see the garden photo below, and it gives a degree of depth to the spread.


When traveling don't forget to take photographs of signs.  They are everywhere, and when printed on card stock, they turn into cute ephemera pieces.  Like the sign that is in the bottom right of the photo above was in a flower garden and says "Epcot Springs into life."  The sign below that says "Thanks for Noticing Me" was on a sidewalk path.  When traveling to national parks, the signs often give historical facts, directions, and wildlife details. A photograph is a great way to remember these details for your journals, mini albums and scrapbook pages.


Nowhere but Disney could you wake up in America and visit 9 different countries before sundown. I literally traveled the entire world in 2 days!     This was such an inspiring journey!  I love all the elements poking out of the margins, giving a "Gypsy" feel to my finished book.


Thanks for stopping in today,
 
Tonya Gibbs


Monday, February 17, 2014

Fabric Wrapped Bracelet & One Little Word for 2014

Good morning Artsy Addicts peeps....
I have a little gem to share with you for some time now I have wanted to create a fabric wrapped bracelet!! Yes I have been so inspired by Pinterest there are many beautiful handmade jewelry eye candy! With inspiration and the One Word for the Year has been on my mind....
I have known I wanted to use "courage" as my word..
Just now having time to create a little gem
 to remind me..to have
 "courage".
I started with a torn piece of muslin and Marion Smith Designs stamps "Curious and Typo".
Stamped the word "courage" in Archival Ink in black.
Sewed another piece of torn muslin together...I just stitched over and over...for texture.
Grabbed my Tattered Angels glimmer mist started to spray away...along with more stamping!
Also glimmer mist my seam binding....and to protect the mist from 
running I brushed on a thin layer of multi-medium matte.
Punched my holes for the eyelets!!!!
Added some jump rings, chain and Junque Gems by Marion Smith...
along with my favorite little vintage mother of pearl button with the thread 
still in it....oh love this...
"courage"-gems clock for "time"-tea cup for "relax-take it in"
& vintage button "remember we I have come from".....


Thanks for stopping by today!

Take "courage" and create!
hugs,
Peggy Lee
http://pegbaker.blogspot.com

Supplies:
Marion Smith Designs-stamps "Curious, Typo"
and Junque & Gems.
Tattered Angels-Glimmer mists-graphite, turqouise blue, olive vine, 
tattered leather, slate
Ranger-Claudine Hellmuth Multi-Medium Matte, Archival Ink-black, 
Perfect Pearls Mists-heirloom gold
Tim Holtz-Jump rings
Hug Snug-seam binding
chain
vintage button

Saturday, February 15, 2014

Feautured Artist: Rochelle ~ Madame Ro


Hola! Artsy Addict Divas… 
I am super excited and over the moon about being asked to be a featured guest on this blog. If you could see through your computer screen right now you would see me doing my happy girl groove...lol Thank you ladies so much for allowing me this great opportunity, I am very appreciative!

Well if you are wondering who I am my name is Rochelle, but I have another person that lives in my head and she goes by the name of Madame Ro - my creative alter ego. By day, I live as Rochelle who is an eccentric, down to earth, photographer/graphic designer & single mother of a beautiful one-year-old son- Cameron Jordan.  Rochelle is the more responsible, level-headed, and organized one.  By night, after the bambino takes his trip to la la land, Madame Ro comes out and wrecks creative havoc and causes colorful mischief in her art lab. Madame Ro is the more fun, edgy, adventurous, and creatively crazy one who loves to push creative limits. She is definitely not afraid of color, she loves dimensional art. She is not one to be confined to a boring box. Why play in the sandbox when you can have the world as your playground.
 
My "Right Brain" at work
I am an artist. I was born an artist. I live, eat and breathe art. Heck! When I go to bed I even dream artistically.  That's how passionate I am about this field. I feel that art is who I am, not just what I do. I am most definitely a dreamer. I feel that dreaming is a big part of how my art is created. My creations start in my dreams, when all the pieces of the dream come together then I am able to manifest it onto the canvas (or whatever medium I'm working on at the time).  And in case you were wondering YES! I dream in vivid, saturated colors! (wink)
 
Ever since I could remember I have always loved to create. I started out coloring, and then that led to drawing/painting, which then led to designing (graphic and photography) which in turn led me to where I am today, mixed media. Although I love dabbling into many facets of the arts. I'd have to say mixed media is my obsession.
 
I started crafting/mixed media not too long ago, September 2012. I got my start by creating cards and as my passion for learning, and my urge to create amazing art grew, so did the depths of my projects. I went from creating cards to altering gumball machines.
If I had to pick a favorite on the crafting side it would be altering. I love altering items. I think it's amazing to start off with one thing and turn it into something totally different. I've recently got into mixed media and now I'm hooked. I am a mixed media junkie.  I enjoy playing around with different textures and mediums and learning new techniques. The best part of mixed media is getting dirty... I love it!
 
I have a secret love affair with Marion Smith's designs - she had me at "Romance Novel". After doing some browsing around to learn more about Marion Smith I found the Artsy Addicts Facebook Group and had a total EYEgasm looking at all the wonderful inspiration that all the crafty artists share in this group. AMAZING!
 
Okay so now that I've have written my own novel on this blog..lol… I will shut up now and share with you some of my creations.  The following are a few projects in a series that I’m doing called "Graffiti Chic" you all are getting the first look. I am also sharing a few old projects. #HappyViewing
 
AfroDisiac. This is a painting I created as part of an obsession I have with big afro's..lol. I'm also doing a series called Naturalista it will feature different paintings of ladies with afro textured hair.


This part of my Graffiti Chic series
 This is an Asian Inspired project called "The Pursuit of Happiness" and the quote says
"Some pursue happiness, others create it". 
 
 
This is another Asian Inspired project called "The Journey" and I used an Chinese Proverb as the quote. It reads " The journey of a thousand miles starts with a single step". Also a part of my Graffiti Chic series


Confidence. The quote reads: " ...is believing in yourself when no one else does". As an artist my goal is to inspire, uplift and create something that could change someone's life, or at least brighten their day.


Love is All You Need. My graffiti chic series is a mix of vibrant colors, lots of texture, with an urban "street" vibe.


Here are a few more paintings and craft projects I've created.


Thank you so much for sharing a moment of your time with me today. If you are interested in stalking me (wink) here are my details:

Facebook: https://www.facebook.com/madamerocouture
YouTube: (I do tutorials) http://www.youtube.com/user/stationerychic
Google +: https://plus.google.com+stationerychic
Pinterest: http://www.pinterest.com/GlamCraftsInc/madame-ro-couture-handmade-with-love/
Zibett Store: http://www.zibbet.com/Divaglam

Muah!
Madame Ro


Friday, February 14, 2014

Friends Card by Tonya A. Gibbs

Happy Valentine's Day Crafty Peeps! 

This has been an exciting week for me, and I can't wait to share today's project. Earlier in the week it was announced that I have joined the creative team for Die-namites.  I love their botanical shaped dies. They are perfect for layering in your flower clusters, or as stand alone pieces.


When I first saw the Spring Branch die, I immediately thought about creating a window card. I used my Copics to color the branch on both sides, since it will be seen when the card is open.
 
 
http://www.die-namites.com/Spring-Branch_p_21.html
 
 To add a little texture to the card, I used a Cuttlebug Stylized Flower embossing jacket. A Wink of Stella Pen add a hint of glitter to the flowers and offered the final touch to the card.


I can't wait to share with you future projects using these super fab dies.  If your interested in them, please visit http://www.die-namites.com
 
Thanks for stopping in today,
Tonya A. Gibbs
 
 
Resources:  
  • Die-namites: Spring Branch
  • Ivory Cardstock
  • Provo Craft - Stylized Flower Cuttlebug Embossing Jacket
  • Copic:  R29, G99, E23, B97
  • Zig: Wink of Stella Clear
  • Heidi Swapp: Navy Blue Archival Ink
  • Fiskars: Friends Quotes Clear Acrylic Stamp
  • Spellbinders: Basic Shapes Squares
  • We Are Memory Keepers: Corner Chomper Round


Monday, February 10, 2014

Baby Shower Keepsake Box

Happy Monday morning to all our Artsy Addicts fans....it's Peggy Lee here 
sharing with you all my altered keepsake box.
 That I created for my daughter's friend who is having a baby,
they just had her baby shower! 
Started with a simply dollar store box that I painted the edges.
Added beautiful scrapbook papers-distressed the edges.
With my mixture of plaster and gesso along with a mask (stencil) 
created the texture all over the box.
Added some color with beautiful sprays (your favorites).
Trimmed with laces and trims....vintage buttons and resin pieces.
Handmade fabric flowers, mother of pearl buttons, 
along with embellishments in my scrap piles.
Chipboard bunny came from my stash...gesso it many layers...
sprayed with a mists a few times to build depth.


Thanks for stopping in today,
hugs,
Peggy Lee

Friday, February 7, 2014

Love Note by Tonya Gibbs

Last week I shared with you my little "How I Love You Mini Album".  When I was clearing off my desk for my next project, I realized I had enough scraps to make a few more items.  So today I'm sharing with you a card and treat bag that I made with the scraps.

 
This card came together quickly and I love how it matches the gift that will accompany it. (My little mini).   The sentiment is from a Studio G stamp and was heat embossed with Ranger's Red Glitter embossing powder.  The flags and heart were left over from the Count Down to Kisses Sampler paper.  To give the card some depth between layers,  I added a Cheery Lynn Designs Polynesian Sails Oval Die cut in black cardstock between the background and overlaying banner cluster.   The banner is the b-side of the swirls paper.


For the candy treat bag, I used a couple of  'Mini' candy bars and wrapped the 'Lips and Stash' paper around them, Then placed them into a clear zip bag, and topped it with more of the paper. A little seam binding finished off the top of the bag.  These make super simple Valentines for the little ones  in my world.
 
 
As you know, I love using my scraps.  But I find it super rewarding to use them immediately after a project is complete. 
 
Thanks for stopping in today. 
 
Tonya Gibbs
 
Resources:
  • Canvas Corp Papers - Red & White Swirls
  • Canvas Corp Papers - Count Down to Kisses
  • Canvas Corp Papers - Lips and Stash
  • Cheery Lynn Designs - Polynesian Sails Oval Die
  • EK Success - Scallop Circle Punch
  • Clear Bags - Zip Bag
  • Twix Miniature Candy
  • Seam Binding Black
  • American Crafts - Jute Twine
  • Spellbinders - Square labels die
  • Studio G - Love you stamp
  • Ranger Ink - Red Glitter Embossing Powder
  • Ranger Ink - Distress Embossing Pad
  • Cardstock - Red & Black
  • Sizzix - Swiss Dot Embossing Folder

 
Related Posts Plugin for WordPress, Blogger...
 
Pin It button on image hover