Thursday, August 30, 2012

Marion is Live with Prima Tonight!

Romance Novel Layout with Marion on Live with Prima

Marion has a beautiful layout to share with Prima viewers tonight, on Live with Prima! She will be using her new Romance Novel collection to create this project, along with other Prima pretties.

All of Prima's classes are FREE and broadcasted LIVE from the Prima channel on ustream.com every Thursday. You can also view our classes from the Prima  Youtube channel too! Join Prima's live chats that take place during every broadcast to ask questions and chat with other viewers from all over the world. Hope to see you there!

.............................................................................
Collaged Layout with Marion Smith
Thursday, August 30th at 6:30pm PT/ 9:30pm ET
9/1-1:30am GMT/ 11:30am Sydney
Marioncollagelo
Here's a very fun and easy collage layout using the brand new Romance Novel line by Marion Smith for Prima Marketing. In this workshop you'll learn to use all those bits and pieces to create a collage style layout.
Prima Products:
  • 553890 x 2 -Say it in Crystals
  • 844936 Romance Novel -"Dear John"
  • 844937 Romance Novel -"Harlequin"
  • 844981 Romance Novel -"Messenger"
  • 562144-Bel Canto-Yellow
  • 561666-Sopranos-Pink

Friday, August 24, 2012

Averie Kay - Mixed Media

It is so much fun watching my pages evolve as the trends change.  My latest obsession is mixed media, and I love incorporating it into my scrapbook projects. While I've been doing this for a few years, I love how my technique has evolved. I just can't get enough of the stencils, molding paste, India inks, and gesso. I mean really -  this takes dirty to an entirely new level. 

In today's share - I wanted to showcase this layout that I created of my Niece Averie. The picture was taken last year during an impromptu photo shoot.  She just propped up and I snapped. Tell me she isn't a natural!


This piece is mounted on a piece of Donna Salzar's Corrugated Card board that was distressed and painted with white gesso.  Then a sheet of Prima Madeline Parkway paper was used for the backdrop. I ripped it, tore it, and distressed it with the new Prima Distress tool. Then to add texture, I glued down all the scraps laying on my desk which included pieces of a doily, hymnal pages, linen strips, and I also included a few strips of Masking tape. I tried not to glue the edges of these elements down so that I could "fluff " them up for texture.   Then I used the stencil and molding paste to add even more texture.  Once the molding paste dried (over night), I then gave the entire background a coat of gesso to make all the elements become cohesive.  To define certain areas of the background I sprinkled a few drops around the canvas of the Iced Spruce Distress reinker.  Then spritzed it with water to dilute it and make it drip.  I love how the background is soft yet course with texture.


I then began to work with my floral spray and layered elements. All the metal pieces were different colors and I found this distracting.  So I grabbed my Snow Cap alcohol ink, and began recoloring them.  This helped them blend into the background, I then dry brushed a bit of the Prima Worn Jean Chalk over the top to give them a little more pop.  The burgundy roses in the Tendrils Grape vine were a bit too bright, so I dry brushed some gesso over them.  I love how this technique made them look shabby like they were part of the wall when it was painted.

I tucked a tag in behind the picture so that I could write Ms. Averie a message.  I think that journaling becomes distracting when I use these as canvases on my wall. However, I feel that journaling is important so I try to hide it somewhere on the layout or place it on the back.  To make the tag blend better with the layout - I distressed it with the Iced Spruce, and Antique Linen. Then I tied off a shabby torn piece of seam binding that I had died with the Ice Spruce.  This made it more elegant, and called attention to the fact that it needed to be pulled out.

Who would have thought that you could take all those grungy supplies and create something this beautiful?

Thanks you all for stopping in today.

Tonya A. Gibbs
http://www.psychomoms.com


Resources:
  • Prima: Distress Tool, Madeline: Parkway Paper, Chalk: Worn Jeans, Millinery Collection Oatmeal, Flowered Tendrils Grape, Marion Smith Trinkets: Metal Flowers #4, Metal Flower #3, Shabby Chic Metal Treasures: Hitches (Birdcage)
  • Pink Paislee: Butterfly Charm
  • Ranger: Tim Holtz Idea-ology Adornments (bird), Adirondack Alcohol Ink: Snow Cap, Distress Reinkers: Iced Spruce, Distress Ink: Antique Linen, #5 Shipping Tag (manila)
  • Zutter: Donna Salzar Corrugated Card Board.
  • Golden: White Acrylic Gesso, Molding Paste, Gel Medium Matt
  • Crafter's Workshop: Brick Stencil 6x6
  • Misc. Lace, Hymnal Pages, Doily, Burlap, Seam Binding (ivory), linen cloth, Masking tape,
  • Silhouette Cameo
  • Font: Alexie Cooperplate

Friday, August 17, 2012

Stashed Treasures Part 2


Last week I shared with you a layout that I was making. The layout is going to be used as a collaborate book with a group of other friends.   My theme was to use something that I had never used before or scraps. 

Today I wanted to share with you the other side to the layout.


Everything on this side was a scrap. The paper in the background was scraps from the other side, and was quilted together to form the base. A Strip of Prima Almanac paper was used to form a pocket in the middle of the page.  The Inspire label was a remnant from the April Journal from Marion, and the Pocket was also one of the left over pieces from one of Marion's Journals.  The two flowers were cut from scraps of book pages, and the trim and lace were all less than 3 inch pieces that were in my stash.

I love using my scraps, and look how beautiful this all turned out.  I hear people say all the time, I toss my scraps.  Well I don't when I'm between projects I pull those scraps out and I make cards, layouts, journal pages.  

I love how the small pieces of trim on the right side mimic the piano keys on the left.  Funny thing was I didn't realize I had done that until the photographs were taken.

I have a challenge on my blog http://www.psychomomscrapbooks.blogspot.com for using your scraps and/or a product that you have purchased and never used.   Contest ends Sept. 1.  See my blog for details.


Thanks for stopping in today,

Tonya


RESOURCES:   
  1. Prima:   Reflections Paper - Shalamar, Almanac Paper. Black sequin fiber
  2. Graphic 45:  Stamped Girl - Ladies Diary
  3. Ranger:  Distress Markers (colored the girl with them).
  4. Marion Smith Designs:  Envelope and  Journal Card
  5. Tonya Gibbs Designs:  Inspire Label
  6. EK Success Scallop Circle Punch
  7. Tonic Studios: Lacy Scallop Border Punch
  8. Misc. Pearl Trim, Lace, Twine, Buttons, Doily, Black Cardstock.
  9.  

Monday, August 13, 2012

Art Heals

Yes this is so true when your faced with difficult times in your life ART can heal the pain, find relief from the heartache, give you a way to escape.
The past few weeks I haven't created anything which I was finding hard to accept (I had tons of art supplies, paper,inks-just nothing would come to me). Yesterday inspired by Stephanie Ackerman who creates the most beautiful artwork with hearts, a homespun feel. This little canvas came to life titled "In a storm BE brave". We all have little storms that creep upon us so I encourage you to look deep into your heart and create from within. This little canvas speaks deeply to me every time I gazed upon it.
BE BRAVE


 supplies-canvas
Marion's Feb. digital design
glimmer mist, pearl mist, paint, inks, tissue tape, gel med.
stamps and alot of soul searching.

mixed media is freeing, give it a try
Peggy Lee

Friday, August 10, 2012

Stashed Treasures

I was involved in a conversation the other day in a group about buying supplies that are "MUST HAVES" that never get used.  Guilty as charged - I buy and I hoard.  But in the past few years I have issued myself a challenge to "USE" what I have and for every new item I must use something old -  either scraps or products in my stash doesn't matter - but something old for everything new.

So, after the conversation with the friend,  I decided to use what I had in my stash to create this 8x8 layout.  But I wanted to take it one step further and use a tool or stamp that I've never used that has been in my possession for at least a year or more.

NOTE: Part of my journaling is missing from the layout, because I'm mailing it to someone to add to a book, and I would like that to stay private.


So the Telephone is the thing I've had for years and never used it was a Sizzix Original Die that I bought on clearance for $2.00.  Had to HAVE IT - You hear me?   And have never ever used it.  I love how it looks with the Almanac paper from Prima. JUST Gorgeous.  I cut it from black chipboard then used UTEE to make it shiny.

Take a closer look at the handle to the phone  I fussy cute that element from the paper then fused it to the die cut with UTEE.  Love how it looks engraved.


You can really see all the layers in the close ups   I used papers from scraps, and papers from 6x6 pads that I've been hoarding.


My photo and journaling is hidden behind the telephone.  The phone is held closed with a magnet.


Do you have things in your stash that you "had to have" but have never used?   I challenge you to take those items out and use them on a project.  Share with me the project that you created on the Artsy Addicts blog.  I would love to see them. 

Thanks for stopping in today,

Tonya Gibbs

Resources: 
  • Prima: Almanac Paper 6x6, Reflections Paper: Shalimar, Fairy Belle Paper, Almanac - die cuts, Flowers, Distress Tool.
  • My Favorite Things:  Bracket Tab die
  • Tim Holtz: Ideaology - Number Plaques
  • Sizzix: Telephone #2 Original Die
  • Ranger: UTEE
  • Martha Stewart Leaf Punch
  • Twine, Rhinestones
  • Bazzil Black Card stock
  • Sewing Machine
  • Doilies
  • Recollections Washi Tape Silhouette Lady


Thursday, August 9, 2012

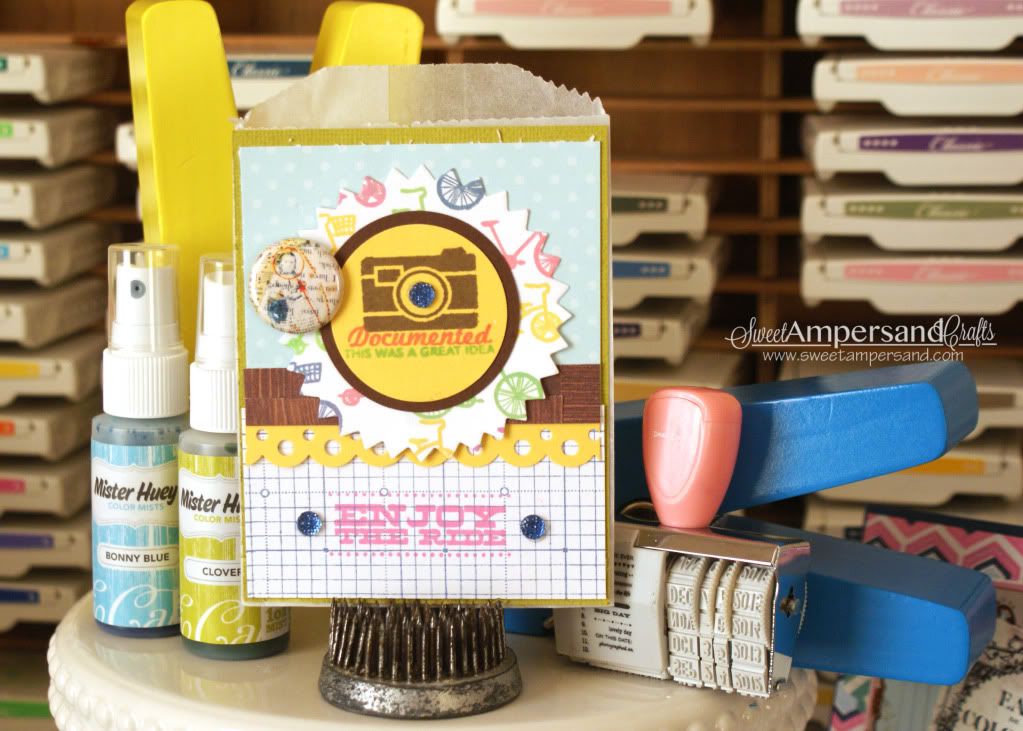
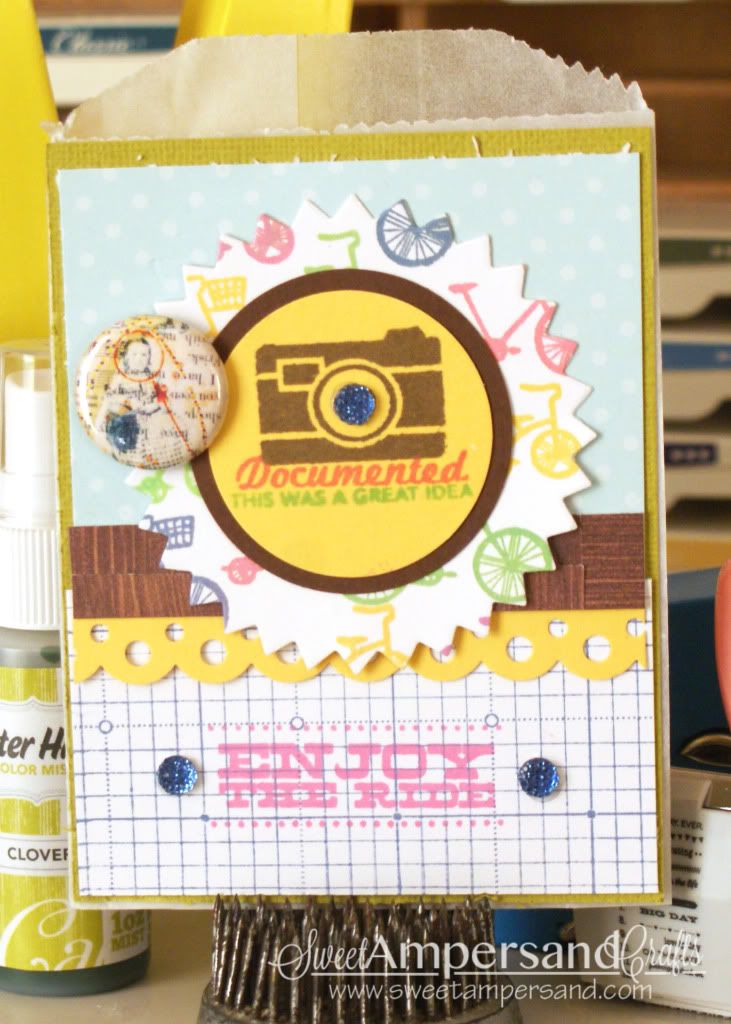
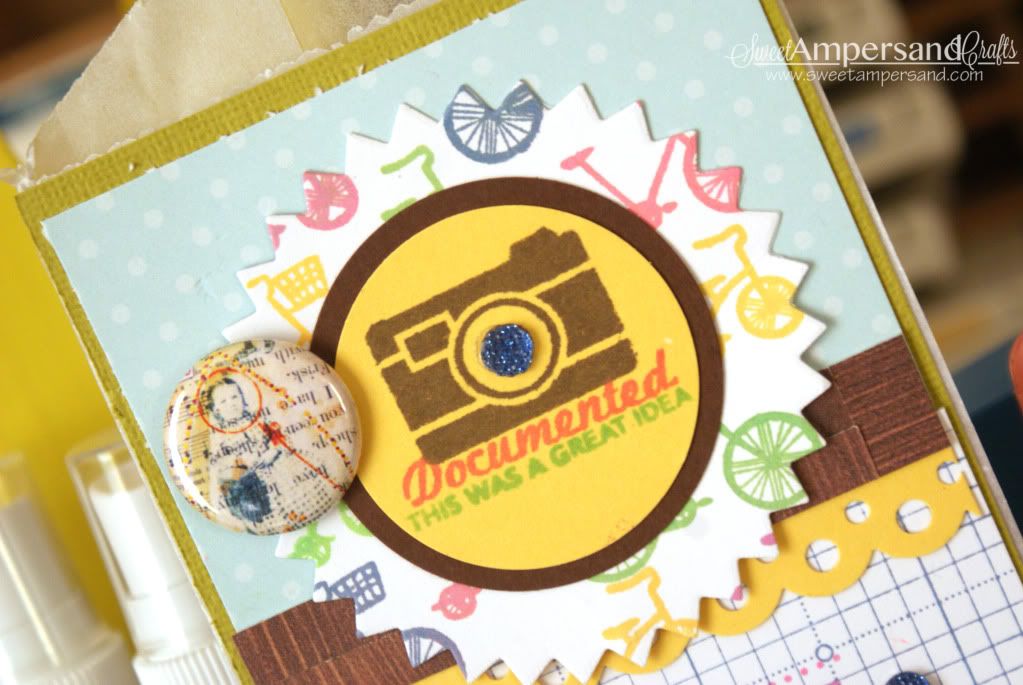
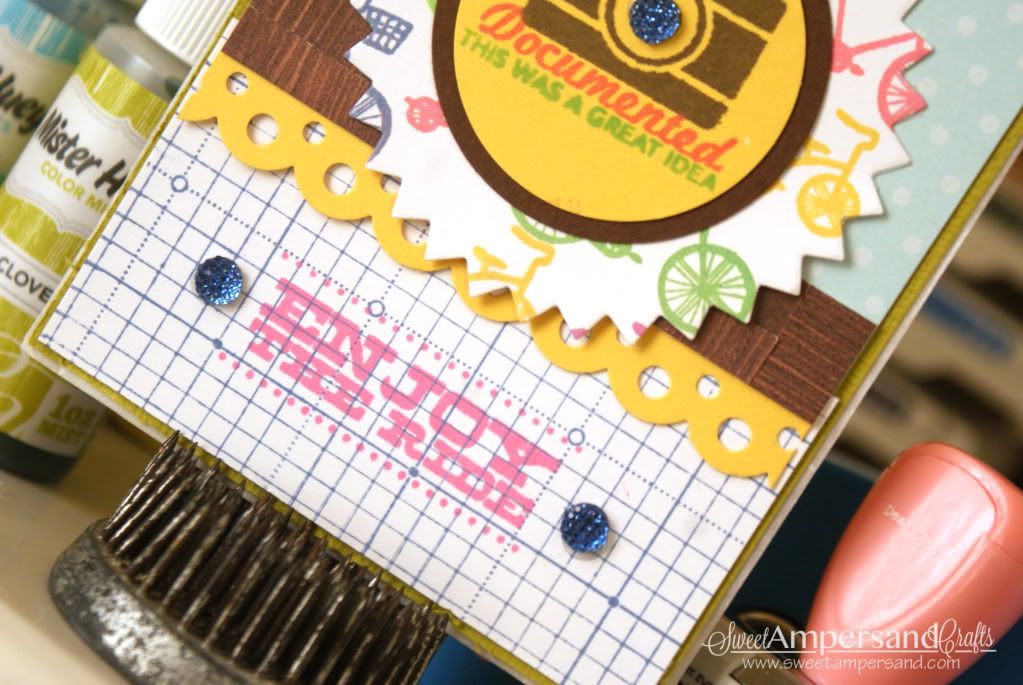
Save the Scrap! Card | Enjoy the Ride

Photobucket

Glassine bags are all the rage in the paper crafting world right now. They are showing up in everyone kits, on scrapbook layouts, mini albums, and cards the like. 

Photobucket

I received this glassine bag in one of the recent Studio Calico kits and decided to jazz it up a bit. 

Photobucket


Whether you use it as an embellishment, an accent, a textured layer, or just as a pocket to hold photos as I did today, make sure you make it from the heart. 

Photobucket


Have a great weekend everyone. 

Supplies: 

Stamps: {Enjoy the Ride, Bicycles} Studio Calico City of Lights Kit, {Camera, Documented, This was ...idea} Studio Calico Project Life Adventure stamp set (Limited Edition). Studio Calico Grid Pattern Background Stamp. 
Cardstock: From my stash. Dies: {Pinking Edge Circle} Papertrey Ink Limitless Layers: 2 1/2 Circle Die Collection, Ink: Hero Arts Shadow Inks


Friday, August 3, 2012

Featured Artist | Catherine Wells

My name is Catherine Wells, I love Dragonflies and this is my story....

I've been married to my best friend and soul mate for nearly 17 years. Between the two of us we have 7 grown children, 17 grandchildren and 1 great grandchild.We are also pet parents to Annie our 7 year old Scottish Terrier. I've lived in Oklahoma most of my life until 1995 when we moved to Wichita.

I'm a full time cake decorator with Walmart and part time amateur photographer. I've had my photos in a couple of gallery shows here in Wichita and even sold some prints. My husband and I have participated in a few craft fairs, even had some things in a local mall when we lived in Oklahoma.  I hoard paper, stamps and embellishments like they're somehow going to be a shortage, and if I only had a dollar in my pocket I would much rather spend it on a crafty sale than eat...seriously!

Crafting has never made me "rich" but it "enriches" my life everyday.

About 6 years ago I discovered Youtube. I know, I'm a late bloomer, lol! Who knew you could find crafting tutorials 24-7! I was in haven. It didn't take me long to find Susi Blu, Marion Smith, Kathryn at the Scrap beach and Stephanie Miller just to name a few. When I got into a rut they were always there (virtually) to cheer me on....and it worked. It's given more confidence to try new things and discover what my true niche is. Crafty Sistas are the BEST!

Fast forward to the present...Domino Pendents.

It was one of those days... just out surfing the net and BAM!... there it was, RachO113. This girl is an amazing mixed media artist! The tutorial was on altered dominoes using alcohol inks. I had to try it. My heart started racing and my head started buzzing with ideas and possibilities. Before I knew it I had created one, then another then another and I haven't stopped since! I've only scratched the surface with this technique and I can't wait to see how far it will take me.

I'm so happy to share with you this process and perhaps you too will make an unique and one of a kind piece of jewelry of your own.


Things you will need:
Domino
Alcohol ink - 3 or 4 colors
Blending solution
Dabber with felt squares
Liquid floor wax
Modge Podge or something to seal the ink
White tissue paper
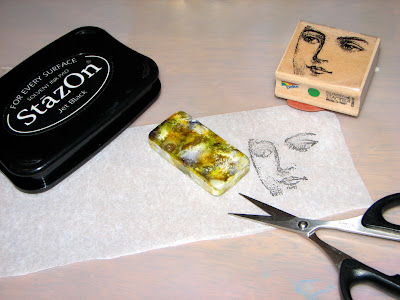
Stamps and Permanent ink pad (I used StazOn)
E6000
Charms for embellishing
Jewelry bail (to hang your chain by)
Chain
Small paint brush (I used a square brush)
Scissors
Paper towel...spills, clean up.

This project will take 1 to 2 days to complete depending on the embellishments you use and the drying time for the adhesive.

Lets begin...


Cover the surface you'll be working on. Ink stains!


Put a felt square on your dabber and add a few drops of ink, add another color and a third if you wish. This really all depends on how you want it to look so you'll have to experiment. Add a drop of blending solution. This breaks up the colors.

Dab and pounce the ink onto your domino, front, back and sides. Set aside to dry.


Stamp the image you want to use on white tissue paper and size it up with the domino so you'll know where the placement of the image will be.


Cut the image to fit the domino.


Pour a small amount of floor wax in a dish and using your brush gently brush across the top and sides of your image. be gentle as the tissue will become fragile when wet. Let this dry.


Apply Modge Podge over the whole domino to seal the image and the ink. Let dry.


Using E6000 to attach assorted charms, words or beads to the top of your image. Let this dry.


Attach the bail for your chain to the back of the domino. Let this dry.


Add chain of your choice. 


Options...

Add Glossy Accents to the top to give it some dimension
Ink around the edge to frame your piece.
Use flat back stones and crystals to add sparkle and bling.

This is only one of many ways to approach this project. Remember...there are no mistakes only opportunities so just have fun!

Big Thanks to Artsy Addicts for giving us all a place to share our artsy creations   ~:)

~~~A big thank you to Catherine for sharing her Altered Domino Art with us.~~~

*Interested in being featured on the blog? Just Facebook message Tonya or Angee for the opportunity.


Thinking of You Card

I wanted to share with you today a card that I created with the Graphic 45 Ladies' Diary paper collection.  I LOVE the vintage look of this paper, and thought the stamped image would be beautiful colored with my Distress Markers by Tim Holtz.


These markers are a bit tricky to color with, but I think the image turned out beautiful.  I used the Ranger Stamping Paper for the base.  Then used Spun Sugar and Victorian Velvet to color her dress.  To achieve the shading I just put a small amount of water on the paper before applying the ink.  Then I spread the ink with a water brush, and tapped the excess water away with a paper towel to keep the paper from buckling.  Here is a close up of the girl.


In this photo, you can see the Prima Cabbage roses were also painted with the Tim Holtz Spun Sugar pen,  I put streaks of color onto the roses then used the water brush to spread the ink around.  This technique gave the flowers a variegated look.


Do you have the Distress Markers?  If so, how are you using them.
Thanks for stopping in today.

Tonya Gibbs


Resources:
  • Graphic 45:   Ladies' Diary "Moment in Time" paper, Lady's Diary Stamp No. 6
  • Prima: wooden clock, cabbage roses, mini roses
  • Ranger: Tim Holtz Distress Markers:  Spun Sugar, Victorian Velvet (Dress & Hat), Aged Mahogany (Hat), Tattered Rose (Skin), Pumice Stone (shadow), Scattered Straw (background)
  • Gelly Roll - Crystal Star Glitter pen (hat), gold pen for buttons.
  • lace
  • black card stock
  •  


Thursday, August 2, 2012

Save The Scrap! Card | Warmest Thoughts + Giveaway

Good Morning all.

I'm so loving this Save The Scrap! feature. It's alot of fun and so rewarding being able to use up all my wonderful leftovers. And being the foodie that I am leftovers is never a bad sign in my book.

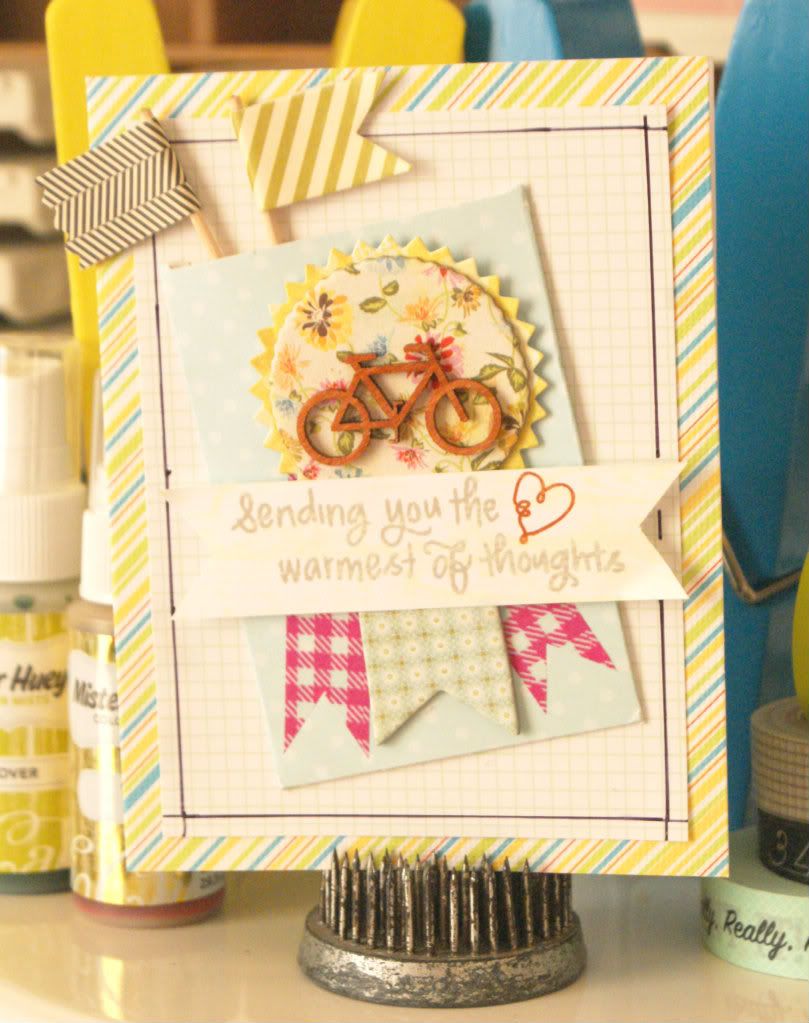
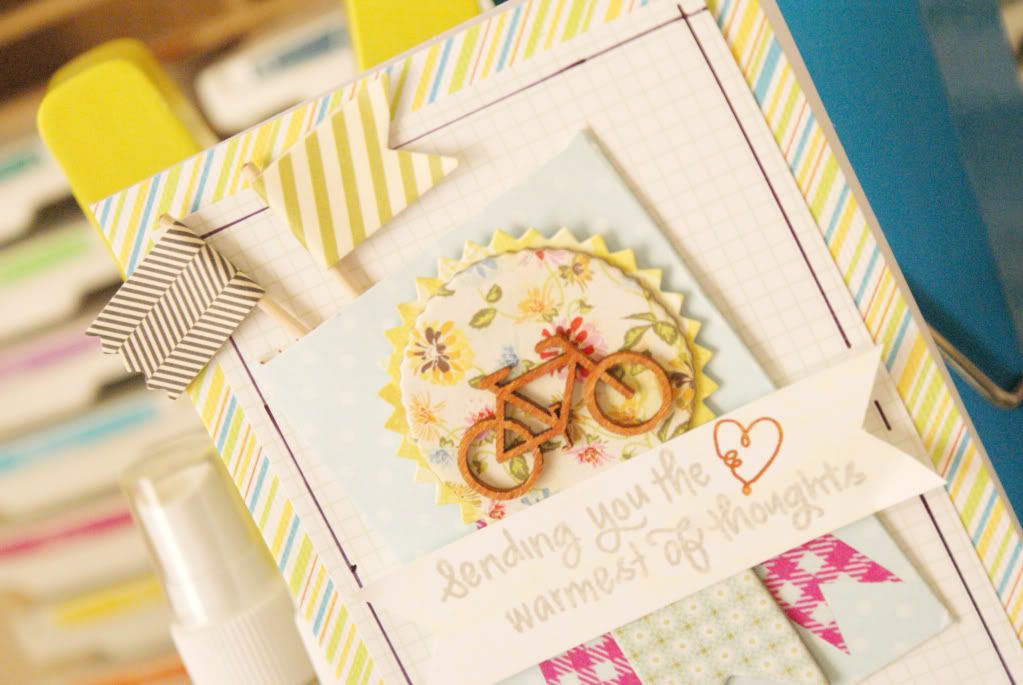
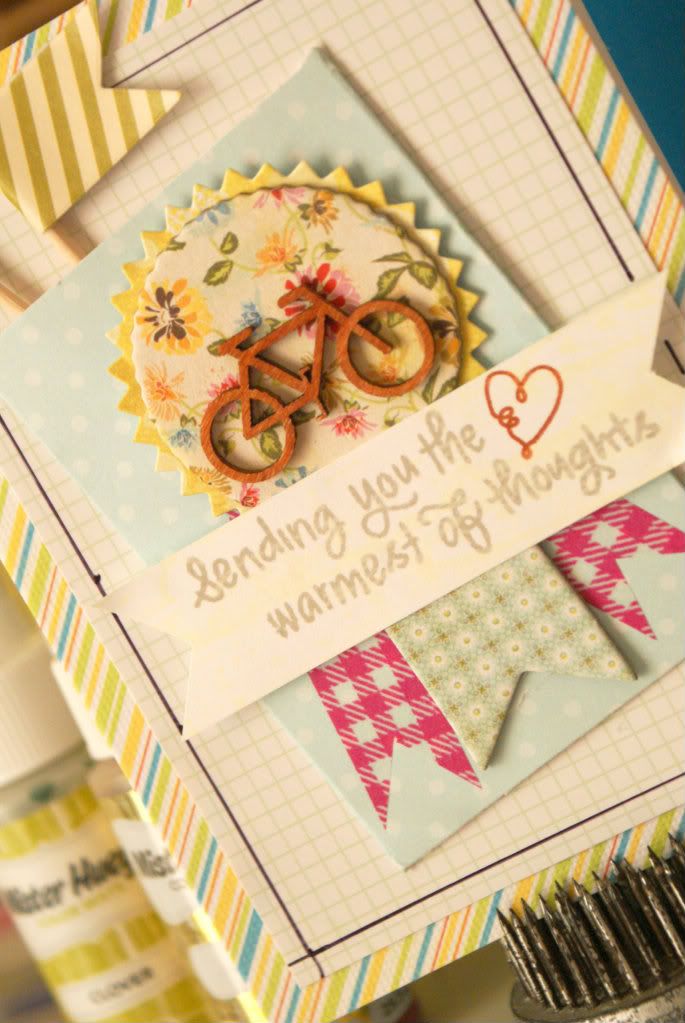
Today I'm sharing another card that includes a little bit of packaging. Can anyone identify the packaging in these pictures? I have a duplicate My Mind's Eye stamp set to giveaway if you can guess correctly. (Does anyone else ever order duplicates by mystake? I don't do this often but from time to time it happens.)

Anyone else want to participate in our Save the Scrap! feature? Should I add a linky so we can all share?
Let me know in the comments if you want to participate.

Ok, now on to the pictures.

WarmestThoughtsFront1

Did you see the packaging? Maybe a close-up will help...

Photobucket

Just one more for good luck.

 WarmestThoughtsCloseUp
Related Posts Plugin for WordPress, Blogger...
 
Pin It button on image hover