Showing posts with label Paper Craft. Show all posts

Wednesday, March 5, 2014

Featured Artist: Athanasia Me and Myself


Hello!

I am very happy to be hosted here, thank you so much for the invitation!

My name is Athanasia, I live in Greece, I have a 5 years old daughter, a 5 months old son and a very supportive and understanding husband. I am a music teacher in elementary school and in my spare time, when I am not playing the piano, I love making handicrafts, felting, altering things and of course scrapbooking.

My love for arts and my cultural worries pushes me constantly into researching and producing new ways of expression and creativeness. My first steps into scrapbooking began with some videos on YouTube. I can't remember exactly what I was looking for, but out of nowhere I run into a 'how-to' video for making a mini album. And that was it! I started searching for more related tutorials (I love watching and learning new techniques) and on the very next day I found myself surrounded by papers and scissors making my first mini album. It has been 3 years since then and although I took a year's brake (due to my pregnancy) now I am back.

I love scrapbooking because it combines such a vast deposit of media types with memories of my life and my family. Inspiration always derives from the photograph I use and the open choice of combination of mixed media techniques. I love to use gesso, mists and stamps and I love tearing papers! Through scraping I think I have found the best way to express myself and exploit my spare time in the best way.

Today I am going to show to you 3 of my favorite techniques that I love doing on my scrapbook pages.

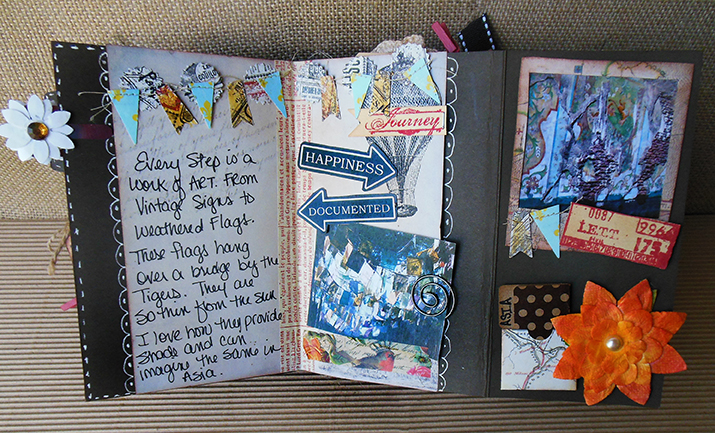
Tearing pages from an old book. I love to create layouts composed by yellowed pages that have been torn from old books. Ι tear them in pieces and place them around my photo in order to create a frame. In my most recent layouts I use pages from an old chemistry book that a good friend of mine found dumped on the street!


2.Stamping and masking with gesso or modeling paste. After I glue the paper chunks, Ι choose the stamps and masks that best fit to the photo's subject. Firstly,I remove the photo from the working area and I stamp randomly around the photo's space with several stamps, then I mask with gesso on the stamps. Sometimes, when the gesso gets dry, I restamp over it to create a connection between the different media. After the stamping, the photo is placed back in position and I choose the embellishments that fits into the theme.


3.Altering embellishments and chipboard pieces. I like altering things, a common practice in my scrapbook projects. I like to cut into pieces all the flowers, stickers and chipboard elements, so as to give them new and unique shape. I then stamp on them, gesso them, or both. In my opinion this gives character and style to my work.


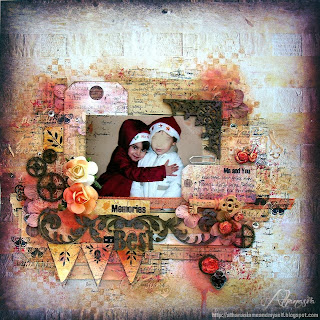
Now it's time to show you a bonus tutorial for you. I have created a simple layout with few embellishments following these three steps!

I place the photo, the torn vintage pages chunks ans the big embellishments that are going to be used in my layout.


I remove the photo and start stamping.


More stamps!

Time for masking with gesso...


I place the painted and stamped chipboard pieces, I do some doodling around the tags and stickers, a little misting at the end and that's it!


I hope you liked my work and my little tips.


For more details and closeups please visit my blog: http://athanasiameandmyself.blogspot.gr/

and don't forget to check on my channel on youtube:
https://www.youtube.com/user/athanasiapap/videos?flow=grid&view=0


Athanasia


Friday, February 21, 2014

7GYPSIES Travel Mini

Last year I  took a trip to Walt Disney's Epcot & Animal Kingdom in Orlando, Fl., and I wanted to create a journal style mini album that could capture not only the pictures of the "aha" inspiring landscape, but my thoughts and notes.  I wanted to make it like a travelogue that had gone along the journey with me - eclectic and worn - gypsy style.
 
7Gypsies Travel line was perfect for my base papers and a bit "non - traditional" for Disney style books. I gathered up several lines of 7Gypsies ephemera, tapes, charms, and stamps, threw in some Canvas Corp tags, recipe cards, and clothes pins. Grabbed some essential Tattered Angels Glimmer Mists and the book was born.  The finished book size is 4.5 x 6 which is great for standard sized photos.


As an added accent, I also created circle and tab tags in Photoshop to accent the folders. I love how things stick out from the margin, and entice you to turn the page. I also did a lot of hand written journaling in this book. My handwriting may not be perfect to me, but I think it really adds character to the book.
 
 
I often spell Gorgeous "Gorjuss" when I text or type it on Facebook, so I wanted my accent in the upper left to reflect the "Tonya" spelling. This adds a little bit of my character to the details. In the bottom right hand corner of the page above there is a clay piece that says "Air Mail". This was created with air dry clay and a 7Gypsies stamp! 


In the photos above and below, I used scraps from 7Gypsies papers to create interesting flags and banners. I love how these pop, and add a feminine accent to the pages.


Doodling with a white gel pen, adds a even more interest. Some of my doodles are loops and some faux stitching. Love how it helps to soften the dark background.


In this spread above - I use recycled clear plastic packaging to create a signature divider.  I used Tim Holtz's distress paint in Firebrick to create a design on the plastic.  I love how you can see the garden photo below, and it gives a degree of depth to the spread.


When traveling don't forget to take photographs of signs.  They are everywhere, and when printed on card stock, they turn into cute ephemera pieces.  Like the sign that is in the bottom right of the photo above was in a flower garden and says "Epcot Springs into life."  The sign below that says "Thanks for Noticing Me" was on a sidewalk path.  When traveling to national parks, the signs often give historical facts, directions, and wildlife details. A photograph is a great way to remember these details for your journals, mini albums and scrapbook pages.


Nowhere but Disney could you wake up in America and visit 9 different countries before sundown. I literally traveled the entire world in 2 days!     This was such an inspiring journey!  I love all the elements poking out of the margins, giving a "Gypsy" feel to my finished book.


Thanks for stopping in today,
 
Tonya Gibbs


Friday, October 25, 2013

Halloween Treat Bags by Tonya Gibbs

Halloween will be here in just a few days.  I know a lot of people love to make "special" treats for some of their friends and loved ones.

Today I wanted to share with you a little treat bag I created using the scraps from my last Ustream class.    Almost everything used to make the bag and the decorations were from the scrap pile! I chose the papers from Marion Smith Designs Nirvana  "Up and Away" paper.


The bag was cut from the Tim Holtz "In the Bag" Die.  Then I used a spellbinders square die to cut a window from one of the panels.   By using scraps each bag will be unique.  Here is a process video on how I made them.


Thanks for stopping in today, and happy haunting!
 
Tonya A. Gibbs

Friday, September 27, 2013

Take Flight Layout by Tonya Gibbs

Today is my daughter, Brittany's 20th Birthday.   I'm so proud of her.  She has blossomed into such a beautiful, caring, and happy young woman.   When she enters the room you never know what to expect. She could speak to you in French, or just start singing - you just never know.  I wanted to showcase her fun spirit on a layout this year for her birthday. Teresa Collins' Memorabilia line is so elegant that I thought it would make the perfect backdrop for my formal black and white photos.  During this photo session she was twirling around and singing to me.  It was such a fun day!


The note cards in this line are pefect!  This one says "Always be Ready To Have the Time of Your Life."  This just seemed to be the perfect advice to give a 20 year old.  The only thing missing is "and take lots of photos!"     I wanted to add a little glitz to the layout - so I used the gold sequins from the collection, along with splatters of gold ink from Liquitex.


I used the Stamps from Teresa's Sweet Afternoon collection as additional accents. I loved the saying on the stamp set. Spread Your Wings, Take Flight. I felt that it really conveys the thoughts a mother has for her 20 year old, and the butterfly gave the perfect touch. I stamped it on vellum and layered two on top of each other, so that they have depth.
 
Here is a process video of me putting the layout together...

Do you have this paper collection?  If so, I would love to see them. Please post photos of your projects on the Artsy Addicts Facebook page. Be sure to tag me in the post!
Thanks for stopping in today,
 
Tonya Gibbs
 
Resources for this layout:
  • Teresa Collins - Memorabilia Collection - 12 x 12 Double Sided Paper - Quotes
  • Teresa Collins - Memorabilia Collection - 12 x 12 Double Sided Paper - Frames
  • Teresa Collins - Memorabilia Collection - 6 x 6 Paper
  • Teresa Collins - Memorabilia Collection - Layered Stickers
  • Teresa Collins - Memorabilia Collection - Sequins
  • Teresa Collins - Sweet Afternoon Collection - Stamps
  • Liquitex - Iridescent Bright Gold Ink
  • Color Box - SurfaceZ Ink - Caribbean
  • Color Box - SurfaceZ Ink - Chocolate
  • EK Success Labels Punch
  • We R Memory Keepers Angel Punch
  • We R Memory Keepers Crop-a-dile
  • Twinery - Aqua Twine
  • Idea-ology - Tim Holtz - Word Plate
  • Idea-ology - Tim Holtz - Crown
  • Idea-ology - Tim Holtz - Tiny Attacher
  • Velum
  • My Favorite Things Stamps - Die-namics First Place Award Ribbon
  • Lace

Friday, August 30, 2013

Digital Printing - Lesson 4 Phone Photos

One of the most common tools for taking photos these days is the "smart phone".  Phone manufacturers have started placing the camera feature as one of the highest selling features.  There is one on the market now that has a 41 megapixel capture. OH MY! Translation - that is better than most cameras on the market today!

So how does this make your scrapbooking digital?  Well, with the introduction of the smart phone, came apps.  I know I spend a lot of time in apps like Instagram, Pixlr, PicsArt, PSTouch, and now for the iPhone users you have Rhonna Farrer's new photo editing app.  All of these apps give you the ability to add cool filters like lighting effects, boken lights, sun rays, text, and frames right to the photo. I spend hours sometimes playing with those filters. It's like video games for adults!  Well, before the phone apps were popular we used to do those same things in photo editors and call the photos "hybrid".  These things make your photos more interesting, or at least help cover up really bad photos!

Today,  I want to share a layout that uses some of these photos, right from my Instagram account.


This layout is dedicated to the awesome friends I've made through YouTube and Facebook.  These women have really captured my heart over the past few years, and it felt so awesome to meet them face to face.

Layout created by Tonya A. Gibbs at Psychomomscrapbooks.blogspot.com using #Instagram photos  #layout, #12x12, #Silhouette, #scrapbooking, #watercolor
 
My photos are printed 2 inches by 2 inches, and when I cropped them, I made them look like little Polaroid shots.  They are ADORABLE.  Each photo is sporting a different photo effect  courtesy of the above mentioned apps.  Oh best part - you don't have to be a professional photographer for swanky photos anymore - the apps do it for you!


In the past year, I've found that my phone really captures my day to day activities more than my camera. Why? Probably because it is always in my hand, and the ability to share is easier.
Printing my Instagrams for my scrapbooking projects is easy. My printer has a wireless feature, and I think there is an app for that too! A lot of online photo processing places now have apps for loading your instagrams and printing them as well. Project life and 365 Photo projects are common ways these have found their way into the paper crafting world. I'm not only taking more photos, but I'm sharing way more photos than I did two years ago thanks to Instagram, Facebook, Twitter, Vine, Path, and Pinterest.

How are you using your phone in your scrapbooking work flow?  I would love to hear about it, please share a project with me in the Artsy Addicts group on Facebook. Make sure you Tag me in the photo!

Thanks,
Tonya Gibbs
http://www.psychomomscrapbooks.blogspot.com

Resources:

  • Recollections - Decorative Tape - Yellow flowers, Blue Flowers
  • Bella Blvd - Decorative Tape - Cotton Candy Chevron
  • Canvas Corp - Pink and Ivory Collection - 12 x 12 Paper - Ribbon Stripe
  • Canvas Corp - White & Kraft Collection - 12 x 12 Paper - Chevron
  • Canvas Corp - Black & Kraft Collection    12 x 12 Paper - Stamped Alpha
  • Canvas Corp - Green and Ivory Collection - 12 x 12 Paper - Dot Reverse
  • Canvas Corp - Brights Collection - 12 x 12 Paper - Yellow and White Big Stripe
  • Canvas Corp - Mini Clothespins - Raspberry
  • Copic - Sketch Marker - B00
  • Staedtler - 102 Stencil
  • Prima  - Chalk - Old Rose
  • Advantus - Tim Holtz - Idea-ology - Tiny Attacher with 100 Tiny Staples
  • EK Success  - Border Punch - Notebook
  • FabScraps - Pearls - Bling - White
  • My Mind's Eye - Sky's the Limit Collection - Decorative Tape
  • Faber-Castell - Mix and Match Collection - Color Gelatos - Yellow, Blue, Pink
  • Silhouette Cameo - Electronic Cutting System
  • American Crafts - Studio Calico - Wood Veneer Pieces - Speech Bubbles
  • American Crafts - Studio Calico -  Wood Veneer Pieces - Cameras
  • Sizzix - Tim Holtz - Alterations Collection - Bigz Die - Die Cutting Template - Picture Wheel
  • Tattered Angels - Glimmer Mist Spray - Maya Blue
  • Tattered Angels - Glimmer Mist Spray - Cherub Pink

Friday, July 12, 2013

Soar Layout

Hi everyone.  Today I wanted to show you a layout that I created with the May Artsy Addicts Kit  featuring MME - Find Your Wings & Fly by Rhonna Farrer.
 
Soar Layout by Tonya Gibbs http://www.psychomomscrapbooks.blogspot.com
 
 
The kits are a monthly subscription for around $40. For more information about the kits and to subscribe please visit: http://www.marionsmithdesigns.com/kit-club.html
 
At the end of  Addie's Birthday party last year she picked up this stack of helium balloons and starting spinning around in a circle.  The photo gives such a good glimpse into her whimsical free spirited approach to life.  I've been holding this photo for a while in hopes of the perfect paper to tell the story. Since this collection has a lot of  hot air balloons, soft pastel colors and girly girl images, I thought it would be perfect.
 
 
Soar Layout by Tonya Gibbs http://www.psychomomscrapbooks.blogspot.com
 
 
Soar Layout by Tonya Gibbs http://www.psychomomscrapbooks.blogspot.comThe layered look printed on one of the papers, allowed me to give the feel of lots of small layers with little effort and no bulk.  I continued the look by layering a few of the pages from the 6x6 pad to form a clustered frame around the photograph. I left the border that has the hole for the paper pad on the paper and distressed it. This technique allowed me to build on the other office supply themes found in the paper.

The arrows were cut from my Silhouette Cameo, and the cut file can be purchased from the Silhouette store. I used both the positive and the negative of the cut on the layout.   The arrows help to give direction and movement to the embellishments.  

I added a little of the washi tape and half a doily to soften up the harsh overlapping lines from the paper.  The Hot Air balloon and Soar Title were the 3D stickers from the collection and offer great dimension to the layout.  To hide a white vase in the background of the photograph, I used one of the brad embellishments next to the title.

I love the new trend of office supplies on layouts.  So I bought a package of reinforced holes and used my Prima Chalk Inks in pastel green to make them match my layout. I also included a small shipping tag.  To give a more organic whimsical look to the layout I sewed some of the elements down and left the strings hanging from the edges, and let the twine free fall around the photo at a diagonal.
 
**DESIGN TIP  I used the negative from a notebook paper punch scrap as one of my layers too.  When punching out borders, or cuts from diecuts, pay attention to the negatives, you may find a hidden treasure.
 
I love all the small details that make up this layout. It was a lot of fun challenging myself to use 6x6 papers to create a 12x12 layout. I would love to see what you guys are doing with your Artsy Addict Kits.  I challenge you to stop hoarding these beautiful papers, and post a project with them on the Artsy Addicts Facebook Wall.  
 
Thanks for stopping in today,
 
Tonya Gibbs
 
 
Resources:
  • My Mind's Eye - Rhonna Farrer  Find Your Wings & Fly:  6x6 paper, brads, Alpha Stickers, 3D Stickers, Washi Tape
  • Prima Chalk Ink
  • Recollections - Washi Tape
  • Paper Source - Flat Back Pearls
  • Prima Fluid Chalk Ink - Pastel Green
  • EK Success - Notebook Paper Border Punch
  • Paper Doily
  • Studio Calico - Speech Bubble Wood Veneer
  • Twinnery - Pink Twine
  • Silhouette - Arrow die cuts
  •  


Friday, June 21, 2013

Happy Day - Layout

 
Today I want to feature a layout that I created using the May Artsy Addicts Kit.  The kit included: My Mind's Eye - Find Your Wings and Fly designed by Rhonna Farrer. The kits are a monthly subscription for around $40.  For more information about the kits and subscribe please visit:  http://www.marionsmithdesigns.com/kit-club.html


Last weekend we attended a birthday party for my Niece Emily who turned one (A layout of Miss Emily is forthcoming - I had to find some supplies first!)  Of course Aunt Tonya took hundreds of photos.  Among some of my favs were these of my Husband, Kenny, being silly with Averie and Addie.  I swear all I hear is "Tickle me Uncle Kenny" when they are around. I wasn't surprised to walk into the living room and see him being attacked by two giggling girls.  They were all so happy I needed the layout to have a fun happy theme, so I chose bright bold colors, but toned them down with a muted blue background.


 **GASP** Is that Glitter I see  on the page?  Yes, Yes it is.  Those of you who have followed me for a while know that I HATE GLITTER WITH A PASSION. However, my goal for this layout was to try some different things.
  1. I wanted to use a glittered title (it was after all a celebration) and silver/gold glittered titles are trendy now.
  2. Use bold colors (again, I tend to migrate to vintage muted colors)
  3. Keep it flat -  I wanted to try my hand at clusters of flat embellishments - (NO FLOWERS allowed!). 
  4. NO sprays/mixed media techniques. (this was really hard for me).
  5. Use multiple photos (I normally only use one)
I know what your thinking -  what alien has taken over her brain?  Sometimes trying things outside your comfort zone will help stimulate your creativity.  I must say as simple as this layout looks IT TOOK ME ALL DAY to complete.  


I am pleased with the result.  I think the colors give a "circus" type feel to the layout and who isn't happy at the circus? I used lots of cuts from my Silhouette Cameo as accents on the right.  I love that pictures really pop off the page against the bright yellow background.  What are your thoughts?
 
I encourage you to try something different - whether it is a style or a product that you don't normal use.  You may stimulate the creative juices and find a "new" you!  Not that I'm going to totally embrace glitter with every project, but hey, I found a way to keep it from shedding so you may see it more often.
 
Thanks for stopping in today,
 
Tonya Gibbs


Friday, June 14, 2013

4th of July Table Caddy

4th of July is one of my all time favorite holidays - JUST LOVE IT!  The colors, the celebrations, parades, parties, fireworks - who could ask for more fun?
 
I was trying to think of some fun decorative ideas for parties.  A few weeks ago I shared with you an invitation, and today I thought I would alter a six pack box to use as a table caddy.  


Here are the supplies I used to alter the caddy.   In addition to the supplies listed below, you need to upcycle a beverage six pack box.  I used two sheets of each of these papers to complete the box.  Measurements will vary depending on your box.  I started with the bottom and completely cover it wrapping about a half an inch up the sides to keep my utensils from falling out. Then covered the over hang with the side panels. 


I used Canvas Corps' Royal Blue And White Stars Reverse Paper as my base. Then made pinwheels with the Red & White Ribbon Stripe paper then cut them in half and topped these beautiful Red Canvas Banners.  Tied the banner with the Red Canvas corp Twine bows.  Then add a little sparkle with party garland, cake pick star Tucked in a Small American Flag as a topper,  and this catty turned out FAB!
Our high school team colors are royal blue, white, and red I think I may modify this caddy after the 4th for a tailgate caddy by removing the flag and adding a football!
 
 
**Side note:  Place a water bottle in the back center spot to weigh the box down so it doesn't blow off the table.  You can camouflage the bottle with paper napkins. **
 
 
Here is a second invitation I made with the scraps from this project.


Thanks for stopping in today,
 
Tonya Gibbs


Friday, May 17, 2013

Patriotic Party Invitations

The 4th of  July, Independence Day here in the USA,  is one of my favorite holidays. The little town that I live in really goes all out on "Our Country Day".  Festivities start on the 3rd and don't end until the Fireworks on the 4th.  My sister and I have always joked about it being class reunion weekend - cause EVERYONE comes home for the 4th. 
 
Earlier this week, Canvas Corp. posted their super awesome papers that are themed for patriotic projects, and I got inspired.  With Memorial Day around the corner and the 4th of July fast approaching, I decided to give you guys a simple card idea that could easily be used for both holidays. 


Canvas Corp:  Royal Blue Stars Reversed Paper, Red-White-Ribbon-Stripe paper, Hemp Rope Red, and Tags and Ties - Corner  White, Ranger: Stickles, Tim Holtz - Cargo Numbers, MFT - Flags Dinamics, Ink-a-dink-a-doo - Stamp, Bazzel Card Stock; Sizzix Basic Stars Die, Fiskars Banner Punch.


I kept the design simple, and flat for mailing.  If I start now, I should have them ready for mailing in mid June - Maybe!

I hope everyone has a great weekend.  Thanks for stopping in today.

Tonya Gibbs
http://www.psychomomscrapbooks.blogspot.com


Friday, April 26, 2013

Tarnished Silver - Tattered Angels


This week has been so fun, I've been trying out some new products and getting my fingers stained with inks.  Today I wanted to share with you one of the cards that I made using the Tattered Angels' Naturally Aged Paint System Bare Metal Tarnished Silver.   This paint system adds so much texture and shine to your dull card stock, that you have to touch it to see if it is metal.


Canvas Corp Mini Red Clothes Pins, 7 Gypsies Washi Tapes, Tattered Angels Naturally Aged Paint System Bare Metal Tarnished Silver. Other: Nesting Labels Punches EK Success and Stamping Up, Studio G Make A Wish Stamp, Ranger:
Archival Ink Jet Black, Tim Holtz Sizzix Alterations Texture Fade Patchwork, Distress Ink Pumice Stone.


For my card base I used a Tim Holtz Alterations Texture Fade Patchwork on the bare card stock, then added my paint mediums.   I love how the paints bring out the texture from the embossing and make this look like embossed metal. 


I have a few videos demonstrating how this card was made. 

The first is a step by step for the paint system


This video shows how I made the card


Thanks for stopping in today, I hope you have a great weekend.  If you are using these paint systems, I would love to see your creations, please share them with me on Facebook. 
 
 
Tonya Gibbs

Related Posts Plugin for WordPress, Blogger...
 
Pin It button on image hover