Showing posts with label card. Show all posts

Friday, May 23, 2014

Baby Shower Card by Tonya Gibbs


Hi everyone, I have a simple little card to share with you today.  Our theme this month is masculine. So I thought I would share a simple little baby shower card that I created using the scraps from the "Spread Your Wings and Fly" kit to create a card.

 
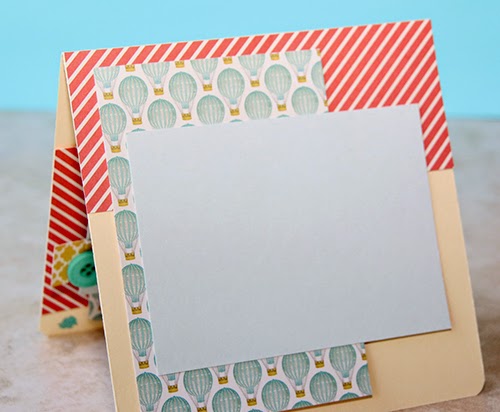
This is the outside of the card.  I only used scraps from the paper collection. Small pieces of scraps when torn on the edge, create a nice washi tape look.  


I decided to decorate the inside of the card with the remaining scraps.  This card and design could easily be used for several occasions by simply modifying the greeting.  Don't forget to post your masculine projects in the Artsy Addicts Facebook page.  I can't wait to see what you create!
 
Thanks for stopping in today. 
 
Tonya Gibbs.

Monday, May 19, 2014

My Hero "Father's Day Card" by Peggy Lee

Good morning everyone, with Father's Day upon us soon in just a few
short weeks...I wanted to share with you all one of my cards.
I used a stamp set called "My Hero"!
Started with a white card base.
Stamped the airplane in chocolate ink (second generations stamping).
I also fussy cut out the images from the Skylark paper packet...
Inked all the edges with chocolate ink.
I popped up the images with tucking the banners to give
depth to the card...like the banners are flying.
As I type this blog post I remember my father who has been gone 
for  many years...I so miss him, love him more deeply!!
I try to share memories of him with my daughters, telling them stories
that he would share, songs he would sing....
I believe even though he is not with us, He Is!
Thanks for stopping in today,
hugs
Peggy Lee


Supplies:
Close To My Heart
Stamps, paper, embellishments


Friday, May 16, 2014

Masculine Cards with Tonya Gibbs

Father's Day will be here before you know it!   I know everyone struggles with masculine cards, so today I'm going to show you two versions of card from one sketch.  


I found this sketch on Pinterest from PageMaps.com  it seemed so simple, and I thought it would make a nice "any" occasion simple flat card that could be mailed to anyone.  Change up the colors to feminine and it would be a great design for a woman as well.   I really love simple versatile sketches. 


So I thought I would make two of these cards. The first is with some scraps left over from a DCWV Tattered Time paper stack.  The gears are super masculine, and if you didn't want to leave the card flat, you could add a few metal gears in a cluster above the sentiment.
 
 
On this version I used only Washi Tape, kept the tapes black and white, then stamped the sentiment  in red so it would pop. 


I hope this inspires you to create a masculine card.  If so, please share your card designs with us on the Artsy Addicts Facebook page.
 
 
Thanks for stopping in today,
Tonya Gibbs


Monday, May 12, 2014

Garden Rose Card by Peggy Lee "Tutorial"

Happy Monday Morning to you all, it's Peggy Lee here
sharing with you all my mixed media card "Garden Rose" Card!
Garden Rose Stamp and Textured Edges Stamp.
Tutorial
I started with watercolor paper.
Using Archival Ink in black stamped the Garden Rose image
several times.
Card Base 4 1/4 x 6 size
Did more stamping on the card base for background texture.
After I stamped the images...I grabbed a few Tattered Angels
Glimmer Mist colors...started water coloring painting..using a small brush.
I painted several parts of the other stamped images..to but cut apart.
To add to the center of rose to give depth.
See the depth of adding layers to your stamped images.
Also added some more texture with gesso and stencils.
LOVE THIS TEXTURE

There you have it a simple mixed media card...just using stamps, ink,
glimmer mist and gesso!!
Give it a try, I know you will love it!!!

Thanks for stopping in,
hugs
Peggy Lee

Supplies:
Marion Smith Designs-Garden Rose & Textured Edges Stamps
Tattered Angels-glimmer mist in Cranberry Zing, Olive Vine & English Ivy
Ranger-Archival ink and liquid pearls in bisque
Stampers Anonymous- Tim Holtz Dot Fade Stencil
water color paper
gesso

Tuesday, May 6, 2014

April Artsy Addicts Challenge Recap

In April, I issued a challenge in the Artsy Addicts Facebook Group for you to use this sketch to create a project of your choice.


Don't forget to Pin it for future reference.  If you decided to follow this sketch make sure you #ArtsyAddictsAprilChallenge, then share your creation with us in the Facebook Group. 

This was the sample that went with the sketch....


We had a few people participate, and I wanted to share their projects along with the admin projects with you today.  Please stop over at their respective blogs and give them some comment love!

Devon's Divine Designs
Look at this fantastic thank you card Devon created with  papers she found in her scrap pile.  I love her soft color choices. And the feathers were a nice festive addition.


Annmarie Colbert - Annie's Stamping Corner
 has  created a festive Birthday card using Graphic 45's Bohemian Bazaar Collection. This collection was released a few seasons ago. Way to go - using that hoard vault goodness! 


Admin Peggy Lee Baker  - Creative Scraps by Peggy Lee
shares with us her creation using a nice pink and green combo with a few mixed media touches!


Admin Tonya Gibbs  - PsychoMoms
Here were my takes on the sketch.


This is a great sketch for a simple easy to create card design.  The challenge was intended to jump start your creative mindset.  Thanks to everyone who participated. Make sure you check my post on Friday for the May Challenge. 

Thanks for stopping in today, 
Tonya Gibbs 
http://www.psychomoms.com

Friday, April 25, 2014

Masculine Card using April Challenge by Tonya Gibbs


  Today I thought I would share with you a masculine card using the April Sketch Challenge.  By making a few extra adjustments, I was able to convert this feminine sketch into a masculine card. 


For today's card  I used a combo of washi tapes from Teresa Collins Designs Memorabilia and You Are My Happy Collections.   Since my washi tape selection had a horizontal pattern, I decided to change the orientation of the card from the original sketch. TIP:  Rotating a sketch can give the sketch a new look! 


I created clusters that combine the sequins from the Teresa Collins' Family Stories and Memorabilia Collections with the Tiny Stars Wood Veneers from Studio Calico. Substituting the star shapes instead of the heart offered a more "masculine" touch to the card.   The sentiment was a stamp from Fiskars' All Year Cheer Cling Mount Stamps, and Teresa Collins Designs' Memorabilia Enamel Dots in black nicely filled in the negative space under the sentiment.  


Another substitution that offered a more masculine feel was replacing the doily with a few nesting cuts from the Spellbinder's Labels 18 die.  I tried to find a labels die in my stash that best matched the pattern in the washi tape.  In this layer cluster, the background was cut from a scrap piece of 7Gypsies corrugated paper. For the next layer,  I covered a scrap of cardstock with the blue washi tape before die-cutting. All these layers offered a beautiful depth of field for my sentiment. 


I hope I have given you a few ideas of how you can multipurpose sketches to fit your masculine needs. 

I hope you guys have time to participate in the April Sketch Challenge.  There are only a few extra days left. There have been a few submission.  To see them check out the LinkZ app at the bottom of this linked post.  

Thanks for stopping in today, 

Tonya Gibbs
http://www.psychomoms.com 


Monday, April 21, 2014

Balloon Ride Thank You Card by Peggy Lee


Good morning, hope everyone had a Happy Easter!!
Over this weekend I had a paper crafting retreat where my 
crafty gals got to create this 
adorable balloon ride thank you card...
I wanted to share with  you all it too!!
"Balloon Ride Thank You Card"
We started with a standard base card.
Blue embossed paper is 1/4 smaller than card base...
Stamped the balloon onto a colonial white card stock-colored
with water colored pencils with a blending pen...
Layered with pattern paper and popped up off the blue embossed paper layer.
Last touch is distressing the edges...and add a crystal gem.
Everyone needs a thank you card....
I had so much fun with all the crafty ladies creating this weekend, then spending
a wonderful Easter Holiday with my church family & family....
Hope you all enjoyed your Holiday!!
Thanks for stopping by today,
hugs,


All supplies are CTMH

Give a Lift Stamp Set #D1581
Balloon Ride Paper Packet #X7180B
Embossing Folder-Quatrefoil #Z1926


Friday, April 18, 2014

Masculine Mixed Media Card by Tonya Gibbs

 
I've been sharing a lot of pretty cards lately, and today thought it would be fun to share with you a masculine card.  Lately I've abandoned my art journal for pieces of 4.25 x 5.5 inch sheets of mixed media paper.  I try out new mediums, play with techniques, and then recycle these panels into card backgrounds.  I find that mixed media techniques make masculine cards come together much easier!  And you could always keep the card 1 layer and display your art rather than lots of layers.
 
Here are the steps I took to create the background
 
 
  1. Apply modeling paste to your card with stencil of choice (I used Heidi Swapps Honeycomb)
  2. Use A Faber-Castell Design Memory Craft Pitt Pen to apply color around the image. 
  3. Use your finger to smooth out the ink.
  4. Select a texture Stamp (I used Marion Smith Designs' Texture Stamp)  Apply ink to the stamp with a contrasting PITT Pen 
 
  1. Apply archival ink around the image to give a distressed look. NOTE: you can use distress inks, but if you add water, they will react with that water.  Archival ink is permanent when dry.) 
  2. Spray a wet medium onto a pallet.  I used Lindy's Stamp Gang Moon Shadow Mist in Gossamer Gold  
  3. Stamp a round object into the ink and apply it to your card
  4. You will see a water ring just like it were left from coffee or tea. 
To finish off the background I added pieces of tissue tape with matt medium.   I added the panel to a piece of black cardstock and created this card for my nephew's birthday.


He loves photography, so I took advantage of using up some scraps to create this photo layers.   The Camera and Polaroid Frame were a Spellbinder's Die.  I then added the Tim Holtz Film Strip Ribbon, and Marion Smith's Washi Tape from her Romance Novel Prima line.   Happy Birthday stamp was from Studio G.  My nephew was turning 13 so I added a few school aged elements like notebook paper, music tape, geometrical shapes, tag and paper clip.  
 
Don't forget about the Sketch Challenge through out the month.  You can get details here!
 
 
Thanks for stopping in today,
 
Tonya Gibbs


Friday, April 4, 2014

Birthday Card and Sketch by Tonya Gibbs

Happy Friday!   I have a super fun, cheerful card and sketch to share with you today!
 
 
This entire card was inspired by the one roll of washi tape!  (I believe it is Recollections brand!)
 
 
So I went into my stash and found these two tapes to coordinate with the dominate tape. 

TIP: When picking out tape, if you have a BOLD pattern as your dominate, select coordinating tapes in smaller widths and softer patterns to contrast your focal tape selection.

 
I then set out to create a sketch for my card!


Look at how fun my card turned out!  The bright colors of the tape are festive and fun!
 
 
I took a small doily and sprayed it with Dylusions Ink Spray in  Lemon Zest. Then Spritzed it with Heidi Swapp's Gold Lume color shine.
 
You could easily use this sketch with scraps of paper as well.  I love to use up those scraps when I have an opportunity.   I hope you enjoyed this card.  I would love to challenge you to use the sketch above and your own stash of washi tape and create a project.   If  you do, please link up your project here.  
 
I look forward to seeing your entries,
Tonya Gibbs
http://www.psychomoms.com

Monday, March 31, 2014

Simply & Quick Card by Peggy Lee Baker

Good morning peeps, it's Peggy Lee here to share
with you all a simply and quick card.
I grab some pretty scrapbooking papers and a card base...
Starting layering them on
added some texture with a stencil and gesso.
Doily, cheese cloth-that I colored with Color Shine Teal
Color the seam binding with Perfect Pearls Mists-Heirloom Gold
Fussy cut out the paper flowers from 
Splash of Color-IOD Cotswald Manor Collection
Added yummie texture and color to the Petaloo flower
with Viva Inka Gold-Lava Red
This would make a wonderful thinking of you card,
get well soon, or birthday.

Thanks for stopping by today,
grab your paper crafting supplies and make a quick card.
hugs,
Peggy Lee

Supplies:
Splash of Color-IOD Cotswald Manor Collection
Petaloo-Little Darjeelings wild blossoms pink
Viva Inka Gold-Lava Red
Tattered Angels-Glimmer Glam-Bordeaur, Glimmer mist-English Ivy
Ranger-Perfect Pearls Mists-Heirloom Gold and TH-Dot Faded Stencil
Heidi Swapp-Color Shine-Tinsel and Teal
Gesso
Doily, seam binding, and cheese cloth


Friday, March 14, 2014

Hello Card Tutorial by Tonya Gibbs

 
Happy Friday my crafty peeps,  I hope you have an exciting weekend planned. Last summer the Teresa Collins Memorabilia line was one of the hottest selling Artsy Addicts kits. I still had a few pieces left over, and wanted to finish off the kit.


  First I came up with a design, and decided to share my sketch with you guys...
 
 
My challenge was to have 95% of the card come from the kit and the other 5% from the scrap pile.  NOTHING NEW WAS USED TO MAKE THIS CARD.


Here is a process video of me making the card..


This design is super clean and simple, and will easily transfer to some other collections that I own.  
 
DESTASH TIP:  If  you have a lot of left overs from kits, make a stack of cards using the same sketch design. Then wrap them up and give to a friend as a gift.   I usually place a pop square on the back of a stack of sentiments. This way my friend can choose the appropriate sentiment when she is ready to mail the card.  I recommend keeping the designs flat (no bulky flowers) since the friend will most likely mail the cards.  My friends love gift sets like this, and it is a great way to de-stash a kit!   Another option is to give them to your church to mail for outreach!
 
Thanks for stopping in today,
 
Tonya Gibbs
 
Resources:
  • Ranger Ink - Embossing Powder - Super Fine Detail - Clear
  • Tim Holtz Distress Ink Pads - Embossing Ink Clear
  • Teresa Collins - Memorabilia Collection - 12 x 12 Double Sided Paper - Quatrefoil
  • Teresa Collins - Memorabilia Collection - 6 x 6 Paper Pad
  • Teresa Collins - Memorabilia Collection - 12 x 12 Die Cut Paper
  • Teresa Collins - Memorabilia Collection - Enamel Dots
  • Sizzix - Tim Holtz - Alterations Collection - Movers and Shapers Die - Vintage Telephone and Typewriter Set
  • Baker's Twine
  • Cardstock
Related Posts Plugin for WordPress, Blogger...
 
Pin It button on image hover