Showing posts with label Baby. Show all posts

Friday, May 23, 2014

Baby Shower Card by Tonya Gibbs


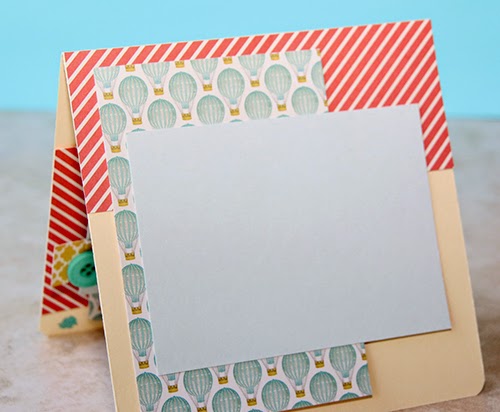
Hi everyone, I have a simple little card to share with you today.  Our theme this month is masculine. So I thought I would share a simple little baby shower card that I created using the scraps from the "Spread Your Wings and Fly" kit to create a card.

 
This is the outside of the card.  I only used scraps from the paper collection. Small pieces of scraps when torn on the edge, create a nice washi tape look.  


I decided to decorate the inside of the card with the remaining scraps.  This card and design could easily be used for several occasions by simply modifying the greeting.  Don't forget to post your masculine projects in the Artsy Addicts Facebook page.  I can't wait to see what you create!
 
Thanks for stopping in today. 
 
Tonya Gibbs.

Monday, February 24, 2014

Baby Shower Card

Good morning peeps!!
Here is a little pretty baby card....
I went to a baby shower over the weekend.
I grabbed my CTMH Babycakes paper-layered the pattern paper...
Cut the zip strips off the edge of the paper....adorable saying 
baby, baby, baby!!
Stamp the little sentiment in slate ink.
Baker's twine double bow with button!
I also love to fussy cut out images from my pattern papers.
This little guy was so adorable couldn't resist!!


Thanks for stopping in today!
hugs,
Peggy Lee

Supplies:
All Close To My Heart

Friday, November 22, 2013

This Makes Me Happy - Layout by Tonya Gibbs

Hi everyone, today I wanted to share with you a layout that I created of my newest niece and I.  I finally got to meet her this past weekend, and couldn't wait to add her sweet photo to my album.
 
 
My only photo was a small Instagram photo. To keep from over powering the small photos,  I wanted to keep the design simple, yet girly and elegant.    I reached deep into my stash for a few scraps, and some odd and ends products. 
 
 
Since the label on the right mentions "...moment with you"   I decided to frame a Prima Romance Novel Clock inside a Prima Resin Frame. Then flanked it with soft Prima Roses.  It still needed a little something so I went DEEP into the hoard vault and pulled out a Say It in Pearls spray and framed it around the flower cluster.   I wanted my journaling to blend into the layout, so I wrote it along the boarder with a pink pen from Zig.
 
Sometimes the simplest projects are really the most powerful.  I challenge you this week to make a layout with a small photo, and keep it simple.  Share your samples with me on Artsy Addicts Facebook page.
 
Thanks for stopping in today,
 
Tonya Gibbs
 
 
Resources:    
  • Bazzill - Smooth white cardstock
  • Teresa Collins - Family Stories Collection - 12 x 12 Double Sided Paper - Numbers
  • Teresa Collins - Family Stories Collection - 12 x 12 Die Cut Paper
  • Teresa Collins - Family Stories Collection - Border Strips with Glitter Accents
  • Teresa Collins - Family Stories Collection - Sequins
  • Prima - Say It In Pearls Collection - Self Adhesive Jewel Art - Bling - Mini Flourish with Roses - Cream
  • Prima - Flower Embellishments - Conventry Serene
  • Prima - Romance Novel Collection - Wood Embellishments - Clocks and Tickets
  • Prima - Resin Collection - Ingvild Bolme - Resin Embellishments - Marvelle
  • Prima - Junk Yard Findings Collection - Ingvild Bolme - Trinkets - Metal Embellishments - Rusty Typo Zippers
  • American Crafts - Studio Calico - Snippets Collection - Wood Veneer Pieces - Chevron
  • American Crafts - Studio Calico - State Fair Collection - Wood Veneer Pieces - Hearts
  • Tattered Angels - Chalkboard Collection - Glimmer Mist Spray - 2 Ounce Bottle - Tutti Fruity


Friday, September 20, 2013

First Birthday Layout - Tonya Gibbs

I'm loving the chalk board trend in scrapbooking papers these days.  But I think my favorite one from summer CHA was the Teresa Collins Designs Memorabilia line.  I had to have it all the second that I saw it!  I love that the secondary colors are yellows, and aquas, the embellies are filled with awesome typography, and I'm totally in love with all those flags! 

Today I wanted to share with you a layout that created of my nephew Gage's first birthday party with this collection.


Layout by Tonya A. Gibbs  using Teresa Collins Designs Memorabilia Collection.  #Layout #Scrapbooking #TeresaCollins #Memorabilia #Birthday #TonyaGibbs #Psychomomscrapbooks
 
 
Here is a process video showing how I made the layout.


Thanks for stopping in today,
 
Tonya A. Gibbs
 
Resources for this layout:
  • Teresa Collins - Memorabilia Collection - 12 x 12 Double Sided Paper - Snippets
  • Teresa Collins - Memorabilia Collection - 12 x 12 Double Sided Paper - Recorded
  • Teresa Collins - Memorabilia Collection - 6 x 6 Paper Pad
  • Teresa Collins - Memorabilia Collection - 12 x 12 Die Cut Paper
  • Teresa Collins - Memorabilia Collection - Envelopes
  • Teresa Collins - Memorabilia Collection - Layered Stickers
  • Teresa Collins - Memorabilia Collection - Sequins
  • Prima - Ingvild Bolme - Chalk Fluid Edger - Pastel Blue
  • Sizzix - Tim Holtz - Sizzlits Decorative Strip Die - Alterations Collection - Die Cutting Template - Filmstrip Frames
  • Gold Glitter
  • Studio Calico - Wood Veneers - Heart & Arrows
  • Jenni Bowlin Studio - Fiskars - Squeeze Punch - Large - Blue Ribbon
  • My Favorite Things Stamps - Die-namics First Place Award Ribbon

Friday, June 22, 2012

Fairy Belle - Meet Emily

Last week I shared with you my journal entries using my Sister In Law's maternity pictures. Well, Ms. Emily was due on July 11 and she decided on June 15 that she wanted to meet us all. 

Today - I am going to introduce you to the newest member of the Gibbs Clan -  Ms. Emily Jean Cunningham she arrived very healthy at 5lbs and 6oz and 17.5 inches long.  Our little Princess needed a layout fitting of royalty and Prima's Fairy Belle seemed to do the trick.


I took 2 sheets of the Fairy Belle 12x12 Paper -  Le Toulle is the top paper, and La Spa is the back paper.  Now this gets a bit tricky --on the La Spa paper I fussy cut around the top portion of the fairy at the top and used her as a pop out.   On the Le Toulle paper I cut out the center section, and used it as a frame over the La Spa.  Then added some dimensional tape between the two layers. Here are some close up pictures of those sections for a better idea.


Then I took the 6x6 paper and cut the fairies and flowers from it to use as layers around the photos.  I added a few of the Eline daisies from Prima and Pearl Centers. I used a Martha Stewart Punch with some Scrap Prima paper to make the daisy leaves for a little more layer.  Then sprinkled a little fairy dust with my Starlight - Clear Glitter Pin over all the stars and on the Eline flowers.  I know the sparkles don't show well in the photos but the layout has a subtle glimmer sprinkled here and there.

This is a Top view so you can see the dimensions. 


Thanks for stopping in today,

Tonya Gibbs

Resources:
  • Prima:
    • 12x12 Fairy Belle:  Le Toulle and La Spa
    • 6x6 Fairy Belle Paper:  Firefly, Dream, Summer Dream
    • Eline Small Daisies
    • Flat back Pearls
    • Scraps from the Annalee Paper Collection for the leaves.
  • Martha Stewart Crafts
    • Trio Butterfly Punch - used scraps from Fairy Belle paper.
    • Branch Punch - scraps from Annalee Prima Paper Collection
  •  Gelly Roll
    • Black Pen (outlined punched butterflies)
    • Starlight Pen (glitter accents on flowers and printed stars)
  • Lace
  • House of 3  - Digibrush  Precious Moments - Gratitude Brush Set

Related Posts Plugin for WordPress, Blogger...
 
Pin It button on image hover