Monday, March 31, 2014

Simply & Quick Card by Peggy Lee Baker

Good morning peeps, it's Peggy Lee here to share
with you all a simply and quick card.
I grab some pretty scrapbooking papers and a card base...
Starting layering them on
added some texture with a stencil and gesso.
Doily, cheese cloth-that I colored with Color Shine Teal
Color the seam binding with Perfect Pearls Mists-Heirloom Gold
Fussy cut out the paper flowers from 
Splash of Color-IOD Cotswald Manor Collection
Added yummie texture and color to the Petaloo flower
with Viva Inka Gold-Lava Red
This would make a wonderful thinking of you card,
get well soon, or birthday.

Thanks for stopping by today,
grab your paper crafting supplies and make a quick card.
hugs,
Peggy Lee

Supplies:
Splash of Color-IOD Cotswald Manor Collection
Petaloo-Little Darjeelings wild blossoms pink
Viva Inka Gold-Lava Red
Tattered Angels-Glimmer Glam-Bordeaur, Glimmer mist-English Ivy
Ranger-Perfect Pearls Mists-Heirloom Gold and TH-Dot Faded Stencil
Heidi Swapp-Color Shine-Tinsel and Teal
Gesso
Doily, seam binding, and cheese cloth


Friday, March 28, 2014

You are the Light Canvas by Tonya Gibbs

 
Hi everyone,  have you had a chance to participate in the blog hop with Marion Smith Designs and Petaloo? Today is the last day. Make sure you pop over to the respective blogs (listed below) and leave a comment. 


These gorgeous Botanicals from Petaloo complimented Marion's paper lines beautifully! Here are the products I used to create this canvas.  


My background was inspired by a rusted sign.  I really wanted the edges to have that rusted metal effect.  I used the Tattered Angels Natural Paint System - Mahogany  but instead of "as directed"  I blotched it on with a paint brush. Once it was dry I applied some crackle paint from Ranger to give it a blistered rusty effect.


Oh my can you say Luscious?  Look at these wonderful embellies all clustered together, with a few extra fussy cut pieces from Marion's paper collections.  I absolutely love how these all work so well together.


 Make sure you comment and subscribe to each blog, as we will be picking some lucky winners to win some awesome new products from both Marion Smith Designs and Petaloo!


I hope you have time to go to the respective blogs and hop.
 
Thanks for stopping in today,
 
Tonya Gibbs
 
Canvas Resources:
  • Marion Smith Designs - Nirvana "Typograph"
  • Marion Smith Designs - Never Grow Up Paper Collection "Sleepover"
  • Marion Smith Designs - Mad Tea Party "Rabbit Hole" 
  • Marion Smith Designs - Junque & Gems Filigree
  • Marion Smith Designs - Junque & Gems Resin Roses
  • Marion Smith Designs - Texture Stamps
  • Petaloo - Botanica Blooms - Purple
  • Petaloo - Botanica Blooms - Pistachio
  • Petaloo - Botanica Minis Teal
  • Petaloo - Velvet Hydrangeas Cream
  • Petaloo - Botanica Minis Lav/Purple
  • Liquetex - Matt Medium
  • Liquetex - Gesso
  • Ranger - Dylusional Sprays, Yellow, Green, Blue
  • Ranger - Crackle Paint Clear Rock Candy
  • Heidi Swapp - Gold Lame Color Shine
  • Satin Ribbon
  • Wooden filigree Frame - Dollar bin
  • Surebonder Detail Glue Gun
  • TCW - Damask Stencil 6x6
  • Faber Castell Design Memory Craft  - Whipped Spackle
  • Tattered Angels Naturally Aged Mahogany Woodgrain


Wednesday, March 26, 2014

Feature Artist Guest Post - Katie Zoey Ho

 
Hello Artsy Addicts,

I'm Katie from this tiny tropical country of Singapore, surrounded with lots of greeneries; widely known as the green city. Blissfully married, we lived in a small apartment away from downtown area where we enjoy peace and fresh air together with our little pots of plants and herbs. I started paper crafting as young as 3 years old, mainly in cutting and folding of papers. The start of all addictions in getting artsy and crafty was in the year 2008 when I discovered what scrapbooking is all about in one of my local craft stores. That's where my crafty journey begins... But due to various commitments in my career, as well as my wedding preparation and house renovation, I stopped crafting coming to 4 years... When I lost my job last August at my career's most prime stage, it occurred to me life is just too short to strive so hard to climb up the corporate ladder. I was earning a living, not living a life. At that very point (since I've too much time to spare), I decided to get myself crafty again. I re-learn and pick up skills all over again after losing touch with the scrapping community for so long... Being a self-taught artist, I explore beyond paper crafting and love to create works that will encourage and inspire. Love everything that's artsy, shabby, vintage, grunge and beautiful, I enjoy creating, designing and love to play with different elements and art mediums to give dimensions and depth to my projects. As of current I'm a Resident Designer at The Art Republic (AR); a small craft studio in Singapore where I design, teach and inspire...

I got to know about Artsy Addicts through one of the scrappers on FB, and that's where I decided to join the group to inspire and get inspired. I'm so glad to know my recent Botanical Tea altered clock project has inspired quite a number of people, which led Tonya & Peggy from the Artsy Addicts Team to send me an invitation to be a Featured Artist!!! Thanks for this wonderful opportunity and it's my pleasure to be featured and share my creations with everyone. Over here, I'm going to share more about this project together with another altered clock project as well, showing what you can do to transform a plain Ikea clock into a piece of Art...


You can easily purchase this RUSCH wall clock for less than $2 at your nearest Ikea store, which is the one I used for my altered clock projects. The initial idea was to upcycle the clock as the face of the clock in AR's studio was badly torn instead of thrashing it away. Hence the revived look of this clock.


I started off by removing the plastic front cover and the hands of the clock, and gesso them to prime the surface. To match the papers I intended to use, I decided to create a chocolate-minty vintage look. Using a mix of latte and chocolate as the base colors and mint as the top coat, I created this weather-worn out look with the aid of weather crackle paint in between.


On the inside, I used a mix of latte and chocolate paints, applying strokes of contrasting paints to create a shabby worn out look. To add some depth, I apply the surfaces lightly with a small amount of gold metallic paint. Once I was happy with the entire look, I sealed it with some PU gloss varnish before embellishing.


So this was the fun part; choosing the elements to embellish the clock. I love the feel of having a cup of hot tea in the garden where you are surrounded with lovely flowers and fluttering butterflies. To bring this idea out, I specifically fussy cut all the roses and flowers to create this huge floral bush surrounding this huge teapot and embedded this whimsical lady inside. To make the butterfly "fly", I adhered one of them onto the second hand. As the hand moves around the clock, it gives an illusion that it is fluttering around the garden...


Here is the list of supplies for this project:
  • Gesso
  • Docrafts Artiste All Purpose Acrylic Paint (Latte)
  • Martha Stewart Satin Acrylic Paint (Mint)
  • Daler-Rowney Heavy Body Acrylic Paint (Burnt Umber & Metallic Gold)
  • Martha Steward Weather Crackle Effect Medium
  • Americiana Duraclear PU Gloss Varnish
  • Graphic 45 Botanical Tea Papers (Botanical Tea, Fauna & Sweet Chamomile)
For the other altered clock project, using similar way in altering I created this By the Sea clock by using a different color scheme and elements. For this, I used contrasting colors; blue on the outside and orange red on the inside of the clock. I added some yellow to tone down the red so that the colors will blend well together. To create this by the seaside, on the beach feel I actually added some twigs and twine ropes on the clock.

 
For a comparison, I used white glue to create the crackle effect instead of any commercial crackle medium which is easily achievable and it's much cost effective. If you're on a budget, this option will be a perfect solution. How much you want to "crack" depends on how much glue you apply. The thicker the layer, the deeper the crack and vice versa. You will need to apply the top coat of paint quickly before the glue dries up. The best time to apply is when the glue starts to get tacky. This is crucial or else you won't be able to achieve the effect especially for finer cracks as the glue will tend to dry up faster.


Once again, I fussy cut almost all the seashells from the paper for embellishments. To give the clock a more on the beach feel, I added some glitter over the seashells. And this completes the look!!!


Here is the list of supplies for this project:
  • Gesso
  • Ceramcoat Acrylic Paints as base coats (Morocan Red & Navy Blue)
  • Ceramcoat Acrylic Paint (Butter Yellow)
  • Martha Stewart Satin & Gloss Acrylic Paints as top coats(Pond & Gernium)
  • Elmer's Glue All Multi-purpose Glue
  • Americiana Duraclear PU Gloss Varnish
  • Ranger Frosted Lace Glitter Sticklers  
  • Graphic 45 By the Sea Papers (By the Sea & Splash)
I hope you've enjoyed what I've shared over here. Do drop by my blog for more inspirations... Give it a try and trust me you will see upcycling via altering a different way... 

Have a lovely day ahead... Good luck and have fun!!!
 

Monday, March 24, 2014

Canvas Flower Pin-Radiant Orchid Challenge & MSD Blog Hop with Petaloo

Have you heard Marion Smith Designs is teaming up with Petaloo!!! 
Join us for our Designer blog hop with Petaloo! We've got prizes from both of our brands so make sure to stop in and comment March 24th-28th!
http://www.marionsmithdesigns.blogspot.com/

Canvas Flower Pin 
Good morning everyone I have decided to take on Tonya Gibbs Challenge from the Artsy Addicts Facebook!! The color inspiration is drawn from the beautiful photo....RADIANT ORCHID is the 2014 Pantone Color of the Year. 
I created a canvas flower pin!
You all know that Easter is right around the corner, this would be so beautiful to wear 
or give as a lovely gift.
I started with a raw natural canvas flower (already per-made for you)...
I grabbed my different mist in the colors to match the challenge...
Started to spray and play!!
I added some cheese clothe, lace, pearls and handmade flower with
some beautiful per made flowers! Seam binding and a facet with paper glued behind it.
Tutorial-handmade flower
I took Tattered Angels-Pure Mistable Paper
I cut a rolled flower out of the paper, misted with water...took my glimmer mist
and a paint brush and dabbed on the color around the edges.
I rolled it up wet, unrolled and dry a little-then rolled up again glued
together....dried again! Whoola!


Thanks for stopping by today!
Don't forget still time to take part in the challenge on Artsy Addicts Facebook page....here is the link
If you are not part of the Artsy Addicts Family just send a friend request!!!

Have a great creative day,
hugs
Peggy Lee
http://pegbaker.blogspot.com

Supplies:
Canvas Corp-Natural Canvas Flower
Tattered Angels-Glimmer Mist in Cranberry Zing and English Ivy
Plain Jane Baseboard in Iris
Simply Sheer in Imperial Blue and Baby Blue
Pure Mistable Paper-Frayed Cotton
Cheese Clothe
Lace trim
Marion Smith Designs-Garment District Papers
Petaloo-Printed Darjeeling-Pink and White
and Wild Mini Blossoms in White
Viva Decor-Precious Metal Colour in Mother of Pearl
Tim Holtz Idea-ology-Facets 


Friday, March 21, 2014

Sun Kiss Cards by Tonya Gibbs

Happy Friday everyone, I hope you are set for a super fab crafty weekend.  I am still on a card making mission.  Today I wanted to share with you another card sketch, and two versions of the same sketch.  
 
 
Confessions of a Paper Addict -  Prima's Sun Kiss collection was one of my all time favorites, and I bought several 6x6 pads.  I was planning to fussy cut and die cut one pad, and then create with the second.  Truth is, I ended up hoarding them both!   So I reached into my sketch arsenal and went to work.


Here is the first version of my card.  
 
Tip: The doily behind the butterfly was cut from the paper, I flipped it upside down and used the white side on my card!)  This is a great way to use up unwanted patterns.
 
I decided to recreate the same card, but rotate the orientation for the second version.  I didn't want to cover up the smaller butterflies on the right, so  I also changed up the location of the sentiment.    


I hope I've given you a few things to think about when using up those extra 6x6 pads.  If you decided to use my sketch, please share it with me on the Artsy Addicts Facebook Page.
 
Thanks for stopping in today,
 
Tonya Gibbs
 

Monday, March 17, 2014

3 Leaf Clover-Jumbo Tag

Good morning everyone, it's Peggy Lee here to wish you all a
Happy St. Patrick's Day!!!
I decided to try my hand at creating a clover....and this is what I came up with (my daughter thought it was a palm tree...lol). I wanted to use the Graphic 45 Tropical Travelogue Collection, I used the paper with beautiful vine leaves on it, I cut them out of the paper inked the edges and glue the centers together. It helped give the leaf some lift and depth, the stem is actually the leftovers from the embellishment sheet with the chipboard pieces...I cut it out, inked and glued down...I also used G45 Staples for the clover center and tag....I just love those metal brads.
Close up of the 3 leaf clover!
This mixed media jumbo tag was a little hard for me (mojo stuck) since we just moved into a new place and my life is all in boxes...ugh...but we started to settle in and I caught a very bad head/chest cold....and in my heart I want to create but in my mind was to sick....so I took a small window of feeling a little better and played....and to be truthful it was just what I needed....I am happy now!!

Thanks for stopping in today.
Wish me luck in finding my crafty supplies in all those boxes!!

hugs, Peggy Lee


Friday, March 14, 2014

Hello Card Tutorial by Tonya Gibbs

 
Happy Friday my crafty peeps,  I hope you have an exciting weekend planned. Last summer the Teresa Collins Memorabilia line was one of the hottest selling Artsy Addicts kits. I still had a few pieces left over, and wanted to finish off the kit.


  First I came up with a design, and decided to share my sketch with you guys...
 
 
My challenge was to have 95% of the card come from the kit and the other 5% from the scrap pile.  NOTHING NEW WAS USED TO MAKE THIS CARD.


Here is a process video of me making the card..


This design is super clean and simple, and will easily transfer to some other collections that I own.  
 
DESTASH TIP:  If  you have a lot of left overs from kits, make a stack of cards using the same sketch design. Then wrap them up and give to a friend as a gift.   I usually place a pop square on the back of a stack of sentiments. This way my friend can choose the appropriate sentiment when she is ready to mail the card.  I recommend keeping the designs flat (no bulky flowers) since the friend will most likely mail the cards.  My friends love gift sets like this, and it is a great way to de-stash a kit!   Another option is to give them to your church to mail for outreach!
 
Thanks for stopping in today,
 
Tonya Gibbs
 
Resources:
  • Ranger Ink - Embossing Powder - Super Fine Detail - Clear
  • Tim Holtz Distress Ink Pads - Embossing Ink Clear
  • Teresa Collins - Memorabilia Collection - 12 x 12 Double Sided Paper - Quatrefoil
  • Teresa Collins - Memorabilia Collection - 6 x 6 Paper Pad
  • Teresa Collins - Memorabilia Collection - 12 x 12 Die Cut Paper
  • Teresa Collins - Memorabilia Collection - Enamel Dots
  • Sizzix - Tim Holtz - Alterations Collection - Movers and Shapers Die - Vintage Telephone and Typewriter Set
  • Baker's Twine
  • Cardstock

Friday, March 7, 2014

Watercolor Card by Tonya Gibbs

 
Hi everyone, today I have a simple little card to share. I decided to create my own background using various Tattered Angels sprays.   I thought it gave an impressionistic effect.  


To create the background I removed the nozzle from the sprays and splattered them all around the page.  Then  I took a paper napkin to dab up the extra. I used a soft lavender colored cardstock as my base to give a nice soft base to the splatters.  
 
I love the effect of the watercolor background. The Flowers were cut from the Tattered Flower Garland Decorative strip die.  I then painted them all with the Tutti Fruity Glimmer Mist.  This was such a fun card to make. 
 
Thanks for stopping in today,
Tonya Gibbs
 
Resources:
  • American Crafts - Ribbon Value Pack - Jute - 24 Spools
  • FabScraps - Pearls - Bling - Cream
  • Martha Stewart Crafts - Punch Around the Page - Craft Punch Set - Swirling Lace
  • Sizzix - Tim Holtz - Alterations Collection - Sizzlits Decorative Strip Die - Tattered Flower Garland
  • Tattered Angels - Glimmer Mist Spray - 2 Ounce Bottle - Honey Dew Mist
  • Tattered Angels - Glimmer Mist Spray - Limited Edition - 2 Ounce Bottle - Peppermint Stick
  • Tattered Angels - Glimmer Mist Spray - 2 Ounce Bottle - SWAK
  • Tattered Angels - Glimmer Mist Spray - 2 Ounce Bottle - Cherub Pink,
 

Wednesday, March 5, 2014

Featured Artist: Athanasia Me and Myself


Hello!

I am very happy to be hosted here, thank you so much for the invitation!

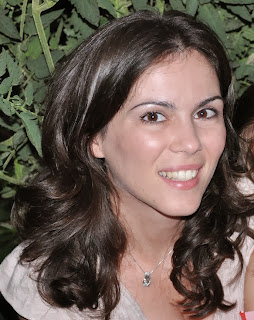
My name is Athanasia, I live in Greece, I have a 5 years old daughter, a 5 months old son and a very supportive and understanding husband. I am a music teacher in elementary school and in my spare time, when I am not playing the piano, I love making handicrafts, felting, altering things and of course scrapbooking.

My love for arts and my cultural worries pushes me constantly into researching and producing new ways of expression and creativeness. My first steps into scrapbooking began with some videos on YouTube. I can't remember exactly what I was looking for, but out of nowhere I run into a 'how-to' video for making a mini album. And that was it! I started searching for more related tutorials (I love watching and learning new techniques) and on the very next day I found myself surrounded by papers and scissors making my first mini album. It has been 3 years since then and although I took a year's brake (due to my pregnancy) now I am back.

I love scrapbooking because it combines such a vast deposit of media types with memories of my life and my family. Inspiration always derives from the photograph I use and the open choice of combination of mixed media techniques. I love to use gesso, mists and stamps and I love tearing papers! Through scraping I think I have found the best way to express myself and exploit my spare time in the best way.

Today I am going to show to you 3 of my favorite techniques that I love doing on my scrapbook pages.

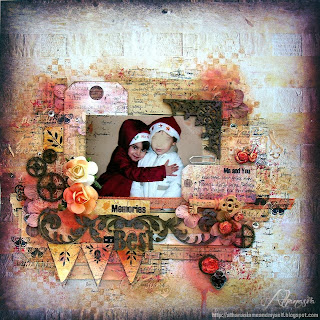
Tearing pages from an old book. I love to create layouts composed by yellowed pages that have been torn from old books. Ι tear them in pieces and place them around my photo in order to create a frame. In my most recent layouts I use pages from an old chemistry book that a good friend of mine found dumped on the street!


2.Stamping and masking with gesso or modeling paste. After I glue the paper chunks, Ι choose the stamps and masks that best fit to the photo's subject. Firstly,I remove the photo from the working area and I stamp randomly around the photo's space with several stamps, then I mask with gesso on the stamps. Sometimes, when the gesso gets dry, I restamp over it to create a connection between the different media. After the stamping, the photo is placed back in position and I choose the embellishments that fits into the theme.


3.Altering embellishments and chipboard pieces. I like altering things, a common practice in my scrapbook projects. I like to cut into pieces all the flowers, stickers and chipboard elements, so as to give them new and unique shape. I then stamp on them, gesso them, or both. In my opinion this gives character and style to my work.


Now it's time to show you a bonus tutorial for you. I have created a simple layout with few embellishments following these three steps!

I place the photo, the torn vintage pages chunks ans the big embellishments that are going to be used in my layout.


I remove the photo and start stamping.


More stamps!

Time for masking with gesso...


I place the painted and stamped chipboard pieces, I do some doodling around the tags and stickers, a little misting at the end and that's it!


I hope you liked my work and my little tips.


For more details and closeups please visit my blog: http://athanasiameandmyself.blogspot.gr/

and don't forget to check on my channel on youtube:
https://www.youtube.com/user/athanasiapap/videos?flow=grid&view=0


Athanasia


Saturday, March 1, 2014

Featured Artist Pepi Valderrama

 
My name is Pepi and I love mixed media art. I started drawing when I was in high school, but I stopped in Uni. Then I took it again while living in Japan. Since living in Japan my style and the color palette I usually use has changed considerably. I got lots of influences from the Japanese culture as well from northern European countries. I also write, create decks and amigurumi (crochetted puppets). I guess that one of the reasons to become crafty has been the will to create cute things. In Japan I was in contact with very talented people who created really cute stuff (drawings, puppets, great art, etc). Since my hands cannot really be still, it was just a matter of discovering which was my favorite medium. And I found it, mixed media. I can mix anything and everything! And it makes me feel free and complete. I just love it!

My blog & store:
blog:
http://depepi.com
store: http://store.depepi.com
tv channel: https://www.youtube.com/user/depepitv/videos (here I upload a video with a whimsy each week)

I like to create whimsies: little funny dolls with big eyes and tiny bodies. This time I created a white bunny whimsy Alice. One of my favorite tales is Alice in Wonderland. I have created a Lenormand deck just for Alice, and today I decided to turn her into a funny white bunny. One of the symbols for March are bunnies! And since they also welcome Spring, I thought it would be awesome if we followed a cute white bunny. Are you up for it?

 
To create your own Whimsy Alice you need the following:
  • Caran d'Ache Watersoluble Neocolors II. You can use the colors you like the most. I used skin color, salmon, orange, raspberry red, light blue, turquoise blue, and turquoise.
  • Acrylics: snow white
  • Faber Castell: black B pen.
  • Scrapbooking paper
  • White glue
  • Stencils
  • Dylusions Spray Ink: dirty martiny (green)
  • Sakura Stamp
  • Versa Magic, cloud white (chalk ink pad)
  • Cretacolor monolith 9B pencil
  • Pilot parallel pens: 2.4mm and 3.8mm
  • Brushes of different sizes (0, 4, 6) to paint the different parts in the drawing.
You don't need to use exactly the same things that I used. You can change them for different art supplies that you love. I highly recommend you to use Pilot parallel pens for the writing. They are awesome and fun to use. (But, again, you don't really need to if you don't want to).


 Whimsies have big heads, big eyes, tiny fatty bodies and funny poses. You can create your whimsies with different attributes, but in general, features are exaggerated. They are meant to be fun and appealing for children. They awaken the inner child in adults, while make children giggle. They live in a dreamworld of colors and bizarre objects. This time, the target is to draw a bunny Alice in Dreamland.


Drawing whimsies also helps you to recover your inner child. If you create your art, or your crafty items while listening to cute or relaxing music, your artwork becomes astounding. Let your hand be guided by your heart when choosing the colors you like the most for your artwork. I tend to use bright colors more than darker ones. There are no mistakes, really. Whimsies are fun and easy to make. In the whimsy world everything is whimsical. Let yourself be guided and you'll find the mojo to create awesome art.


You can use the whimsies to create personalized postcards for your friends, or create wonderful little presents with paper. Awesome for birthdays and ATC swaps, or funny when found in your art journal. 
 
Thanks for stopping in today!
Pepi Valderrama
 

Related Posts Plugin for WordPress, Blogger...
 
Pin It button on image hover